 748 Blog_views
EpicPWA is a platform for creating PWA applications that provides powerful tools for arbitrageurs and media buyers. The platform works with various niches, including Gambling, Betting, Nutra, Dating, Crypto, and many others. In this article, we will show you step-by-step how to register on the platform, create your first PWA application, configure all necessary parameters, and launch it into operation. Follow the instructions, and within a few minutes you'll be able to drive traffic to your PWA!
Registration in the system
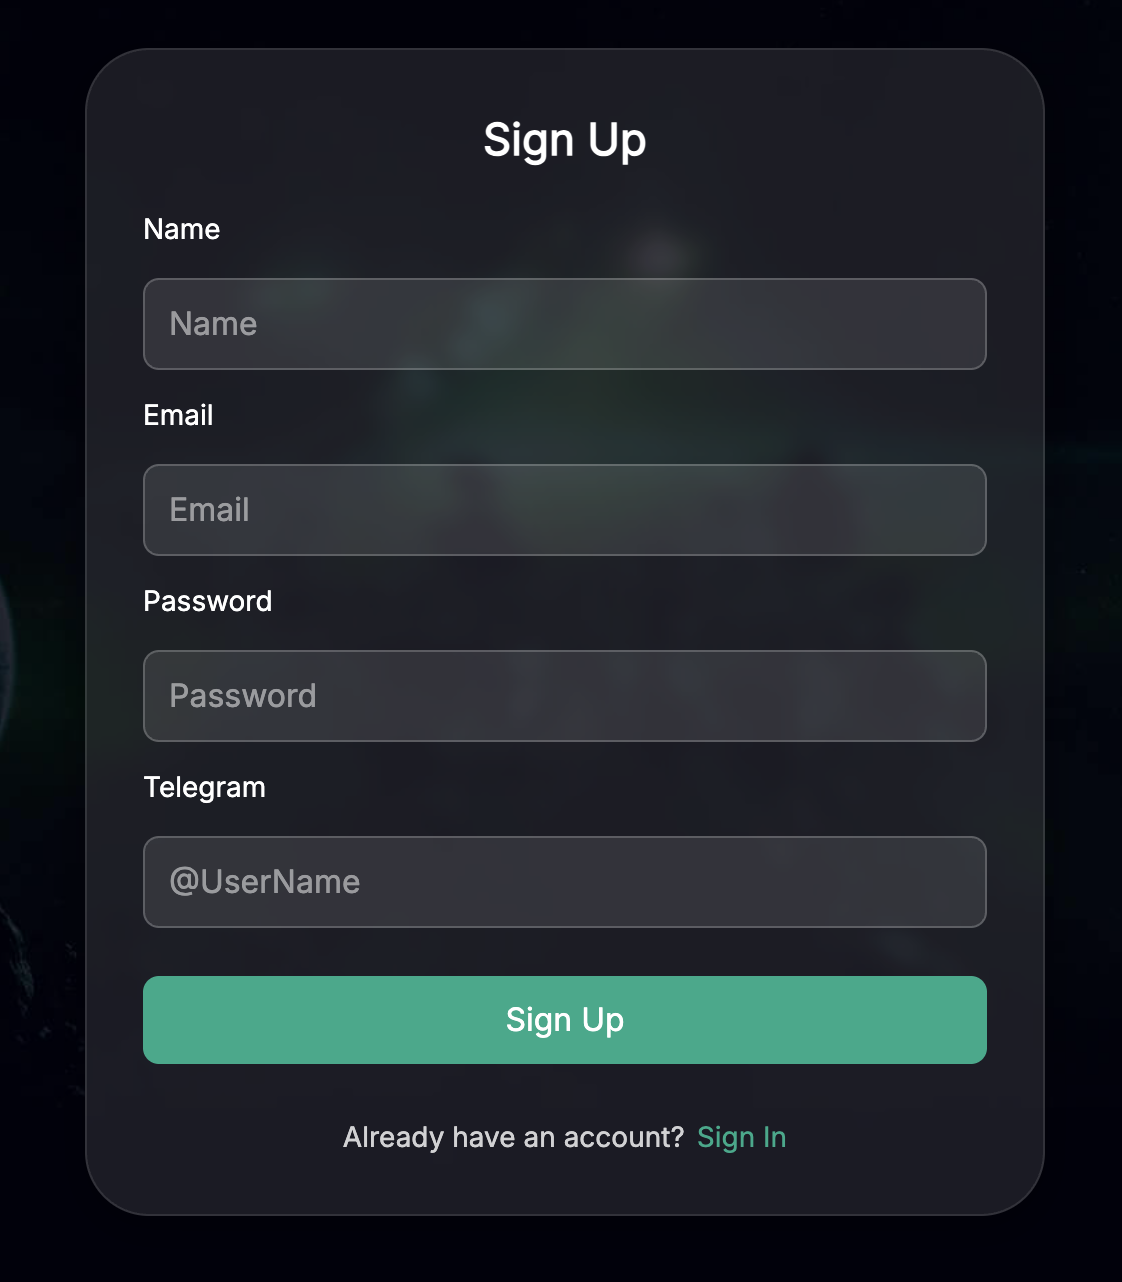
To start working with the platform, you need to complete a simple registration. On the main page, click the "Registration" button, after which an account creation form will open.
During registration, you will need to fill in the following fields:
Name — enter your name or nickname Email — enter a valid email address Password — create a strong password to protect your account Telegram — specify your Telegram username After filling in all fields, click the "Registration" button.
Personal account overview
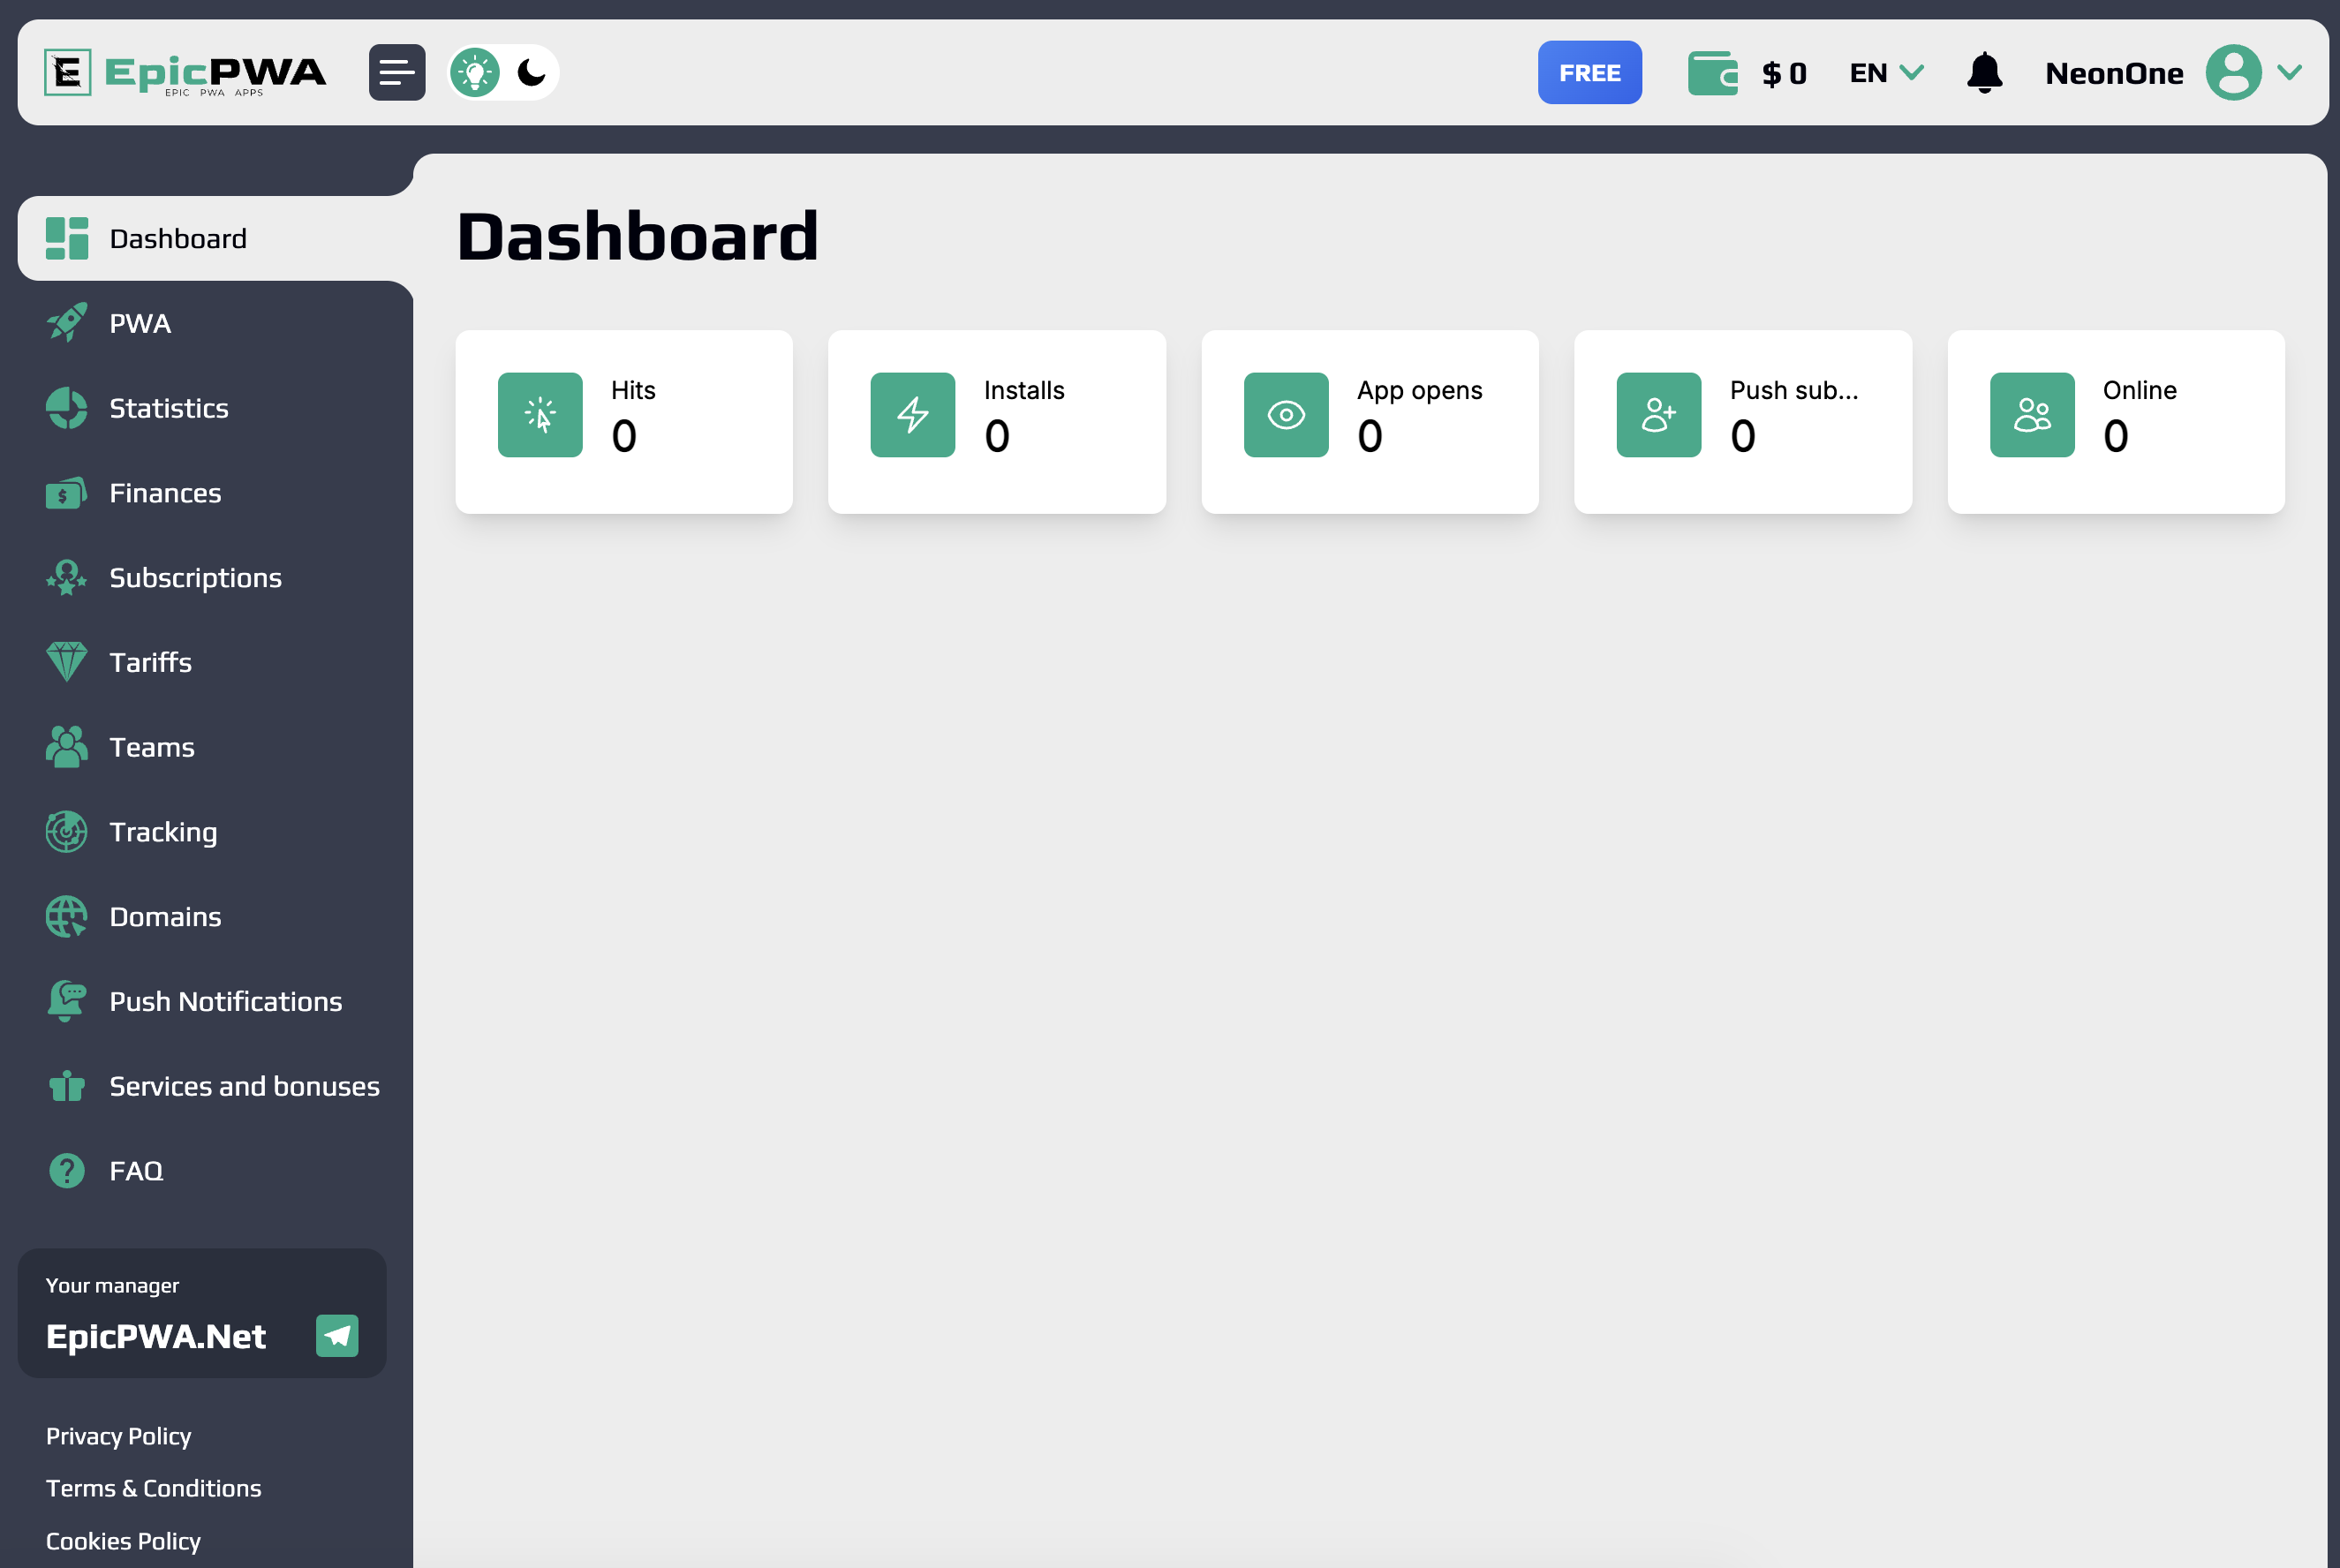
After successful registration, you enter the EpicPWA personal account. On the left side of the screen is the main navigation menu, which includes the following sections:
- • Dashboard — main page with general statistics
- • PWA — management of your applications
- • Statistics — detailed analytics on traffic and conversions
- • Finance — balance and transaction management
- • Subscriptions — selection and management of pricing plans
- • Pricing — view available plans
- • Teams — collaboration with colleagues
- • Tracking — analytics systems setup
- • Domains — connecting your own domains
- • Push notifications — push notification setup
- • Services and bonuses — additional platform features
- • FAQ — answers to frequently asked questions
The main dashboard page displays key metrics: number of hits, installs, app opens, push subscriptions, and online users.
Choosing a pricing plan
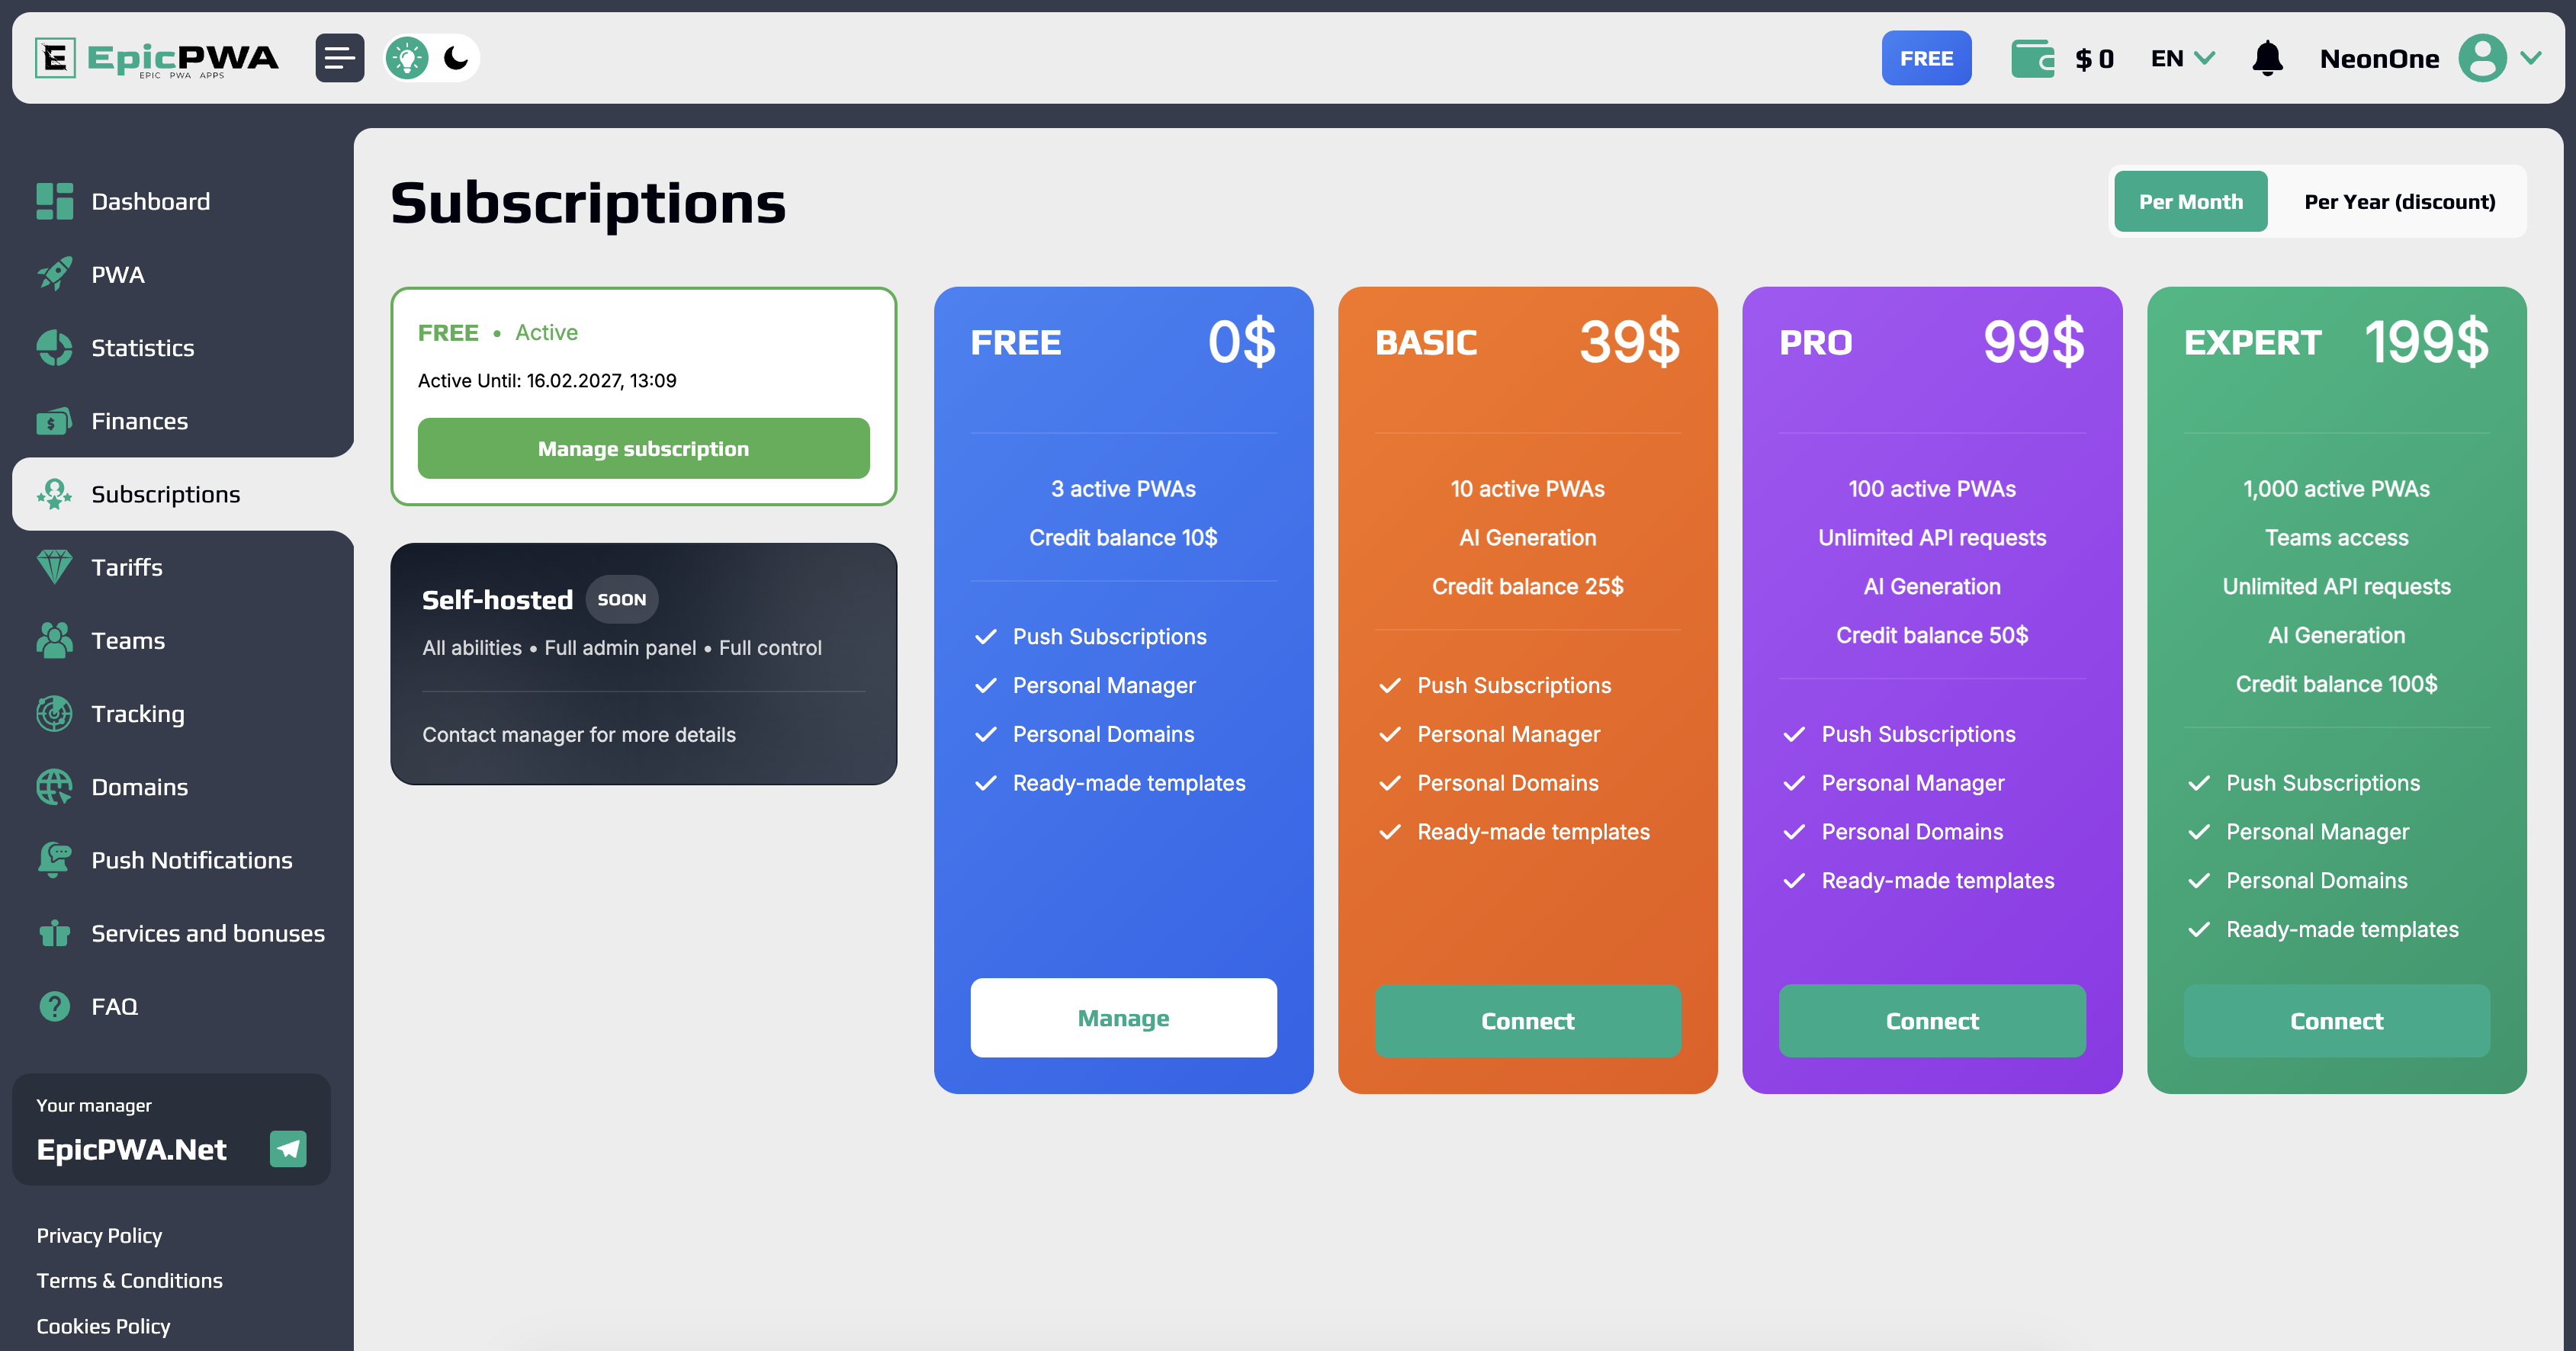
Before creating your first application, you need to choose a suitable pricing plan. Go to the "Subscriptions" section in the side menu.
The platform offers several plans:
FREE — $0/month
- • 3 active PWAs
- • Credit balance $10
- • Push Subscriptions
- • Personal Manager
- • Personal Domains
- • Ready-made Templates
BASIC — $39/month
- • 10 active PWAs
- • AI Generation
- • Credit balance $25
- • All FREE plan features
PRO — $99/month
- • 100 active PWAs
- • Unlimited API requests
- • AI Generation
- • Credit balance $50
- • All BASIC plan features
EXPERT — $199/month
- • 1,000 active PWAs
- • Team access
- • Unlimited API requests
- • AI Generation
- • Credit balance $100
- • All PRO plan features
To get started, the FREE plan is available, which allows you to test the platform and create up to 3 applications. If necessary, you can upgrade your plan at any time.
Also, a Self-hosted option will soon be available for those who want full control over infrastructure.
Creating your first PWA application
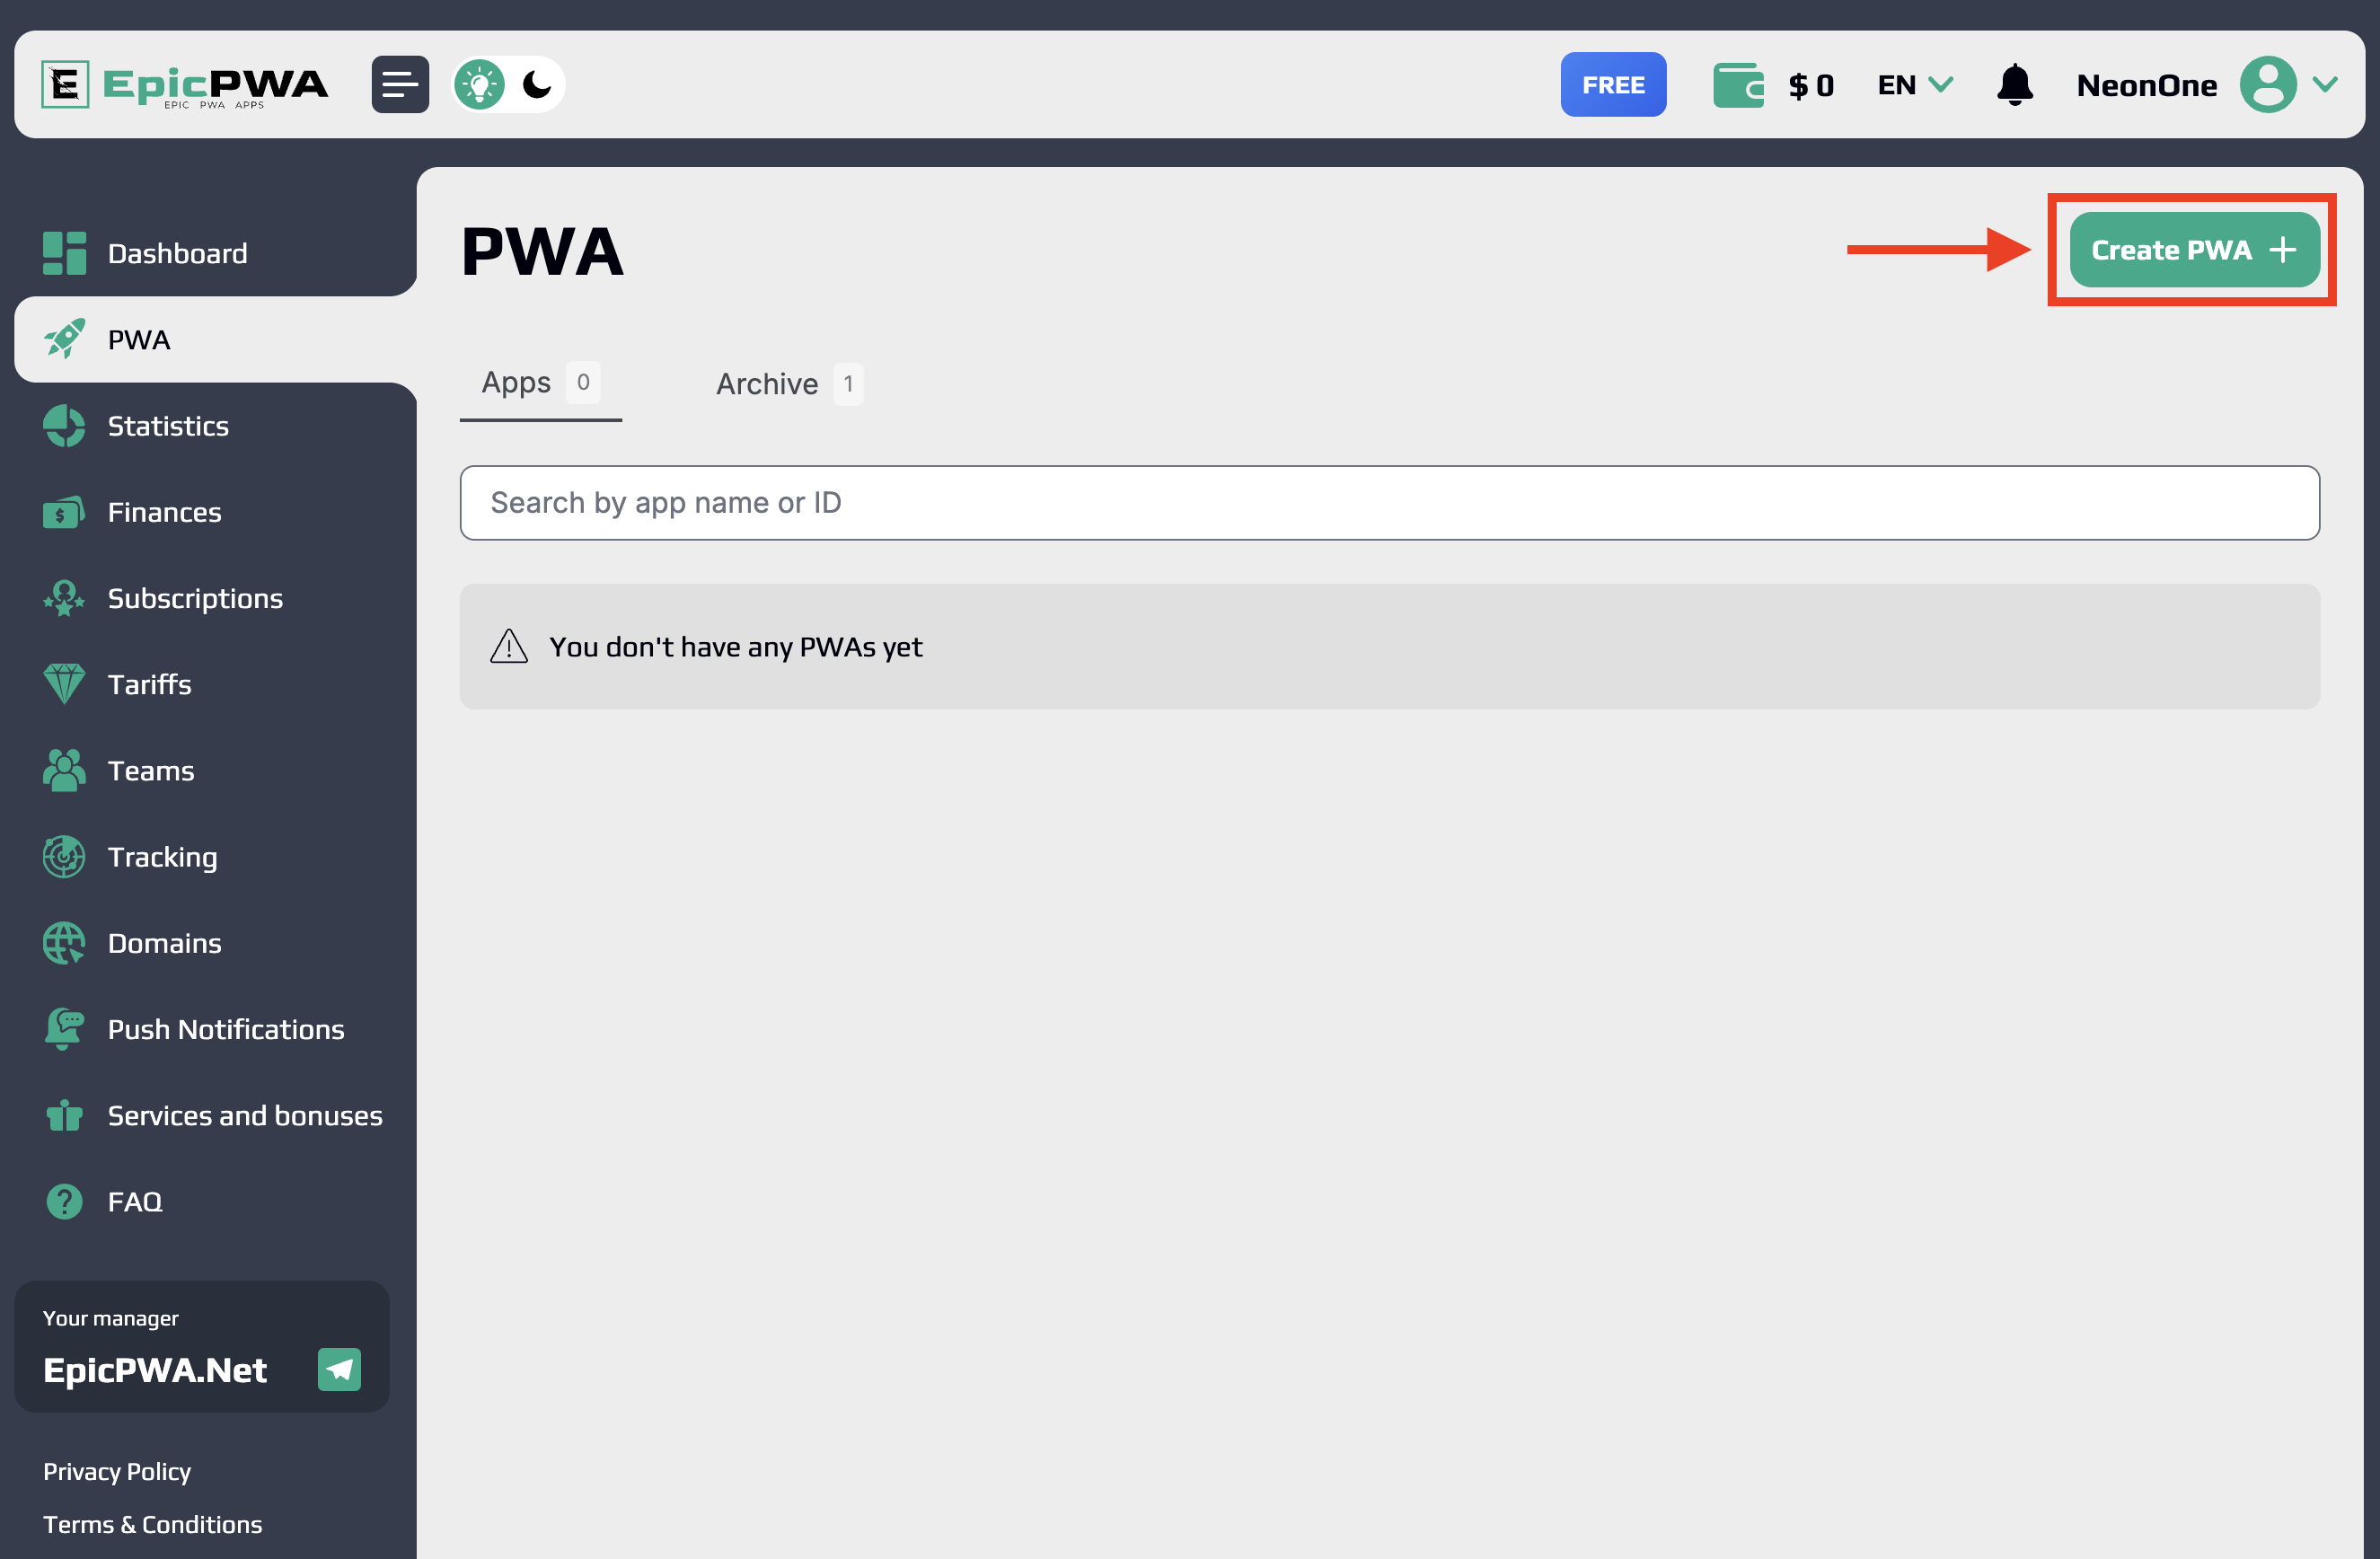
After choosing a plan, go to the "PWA" section through the side menu. On the application management page, click the "Create PWA" button in the upper right corner of the screen.
Configuring basic PWA parameters
After clicking the "Create PWA" button, an editing page will open with the "Settings" tab. Here you will configure the basic parameters of your application.
Basic information
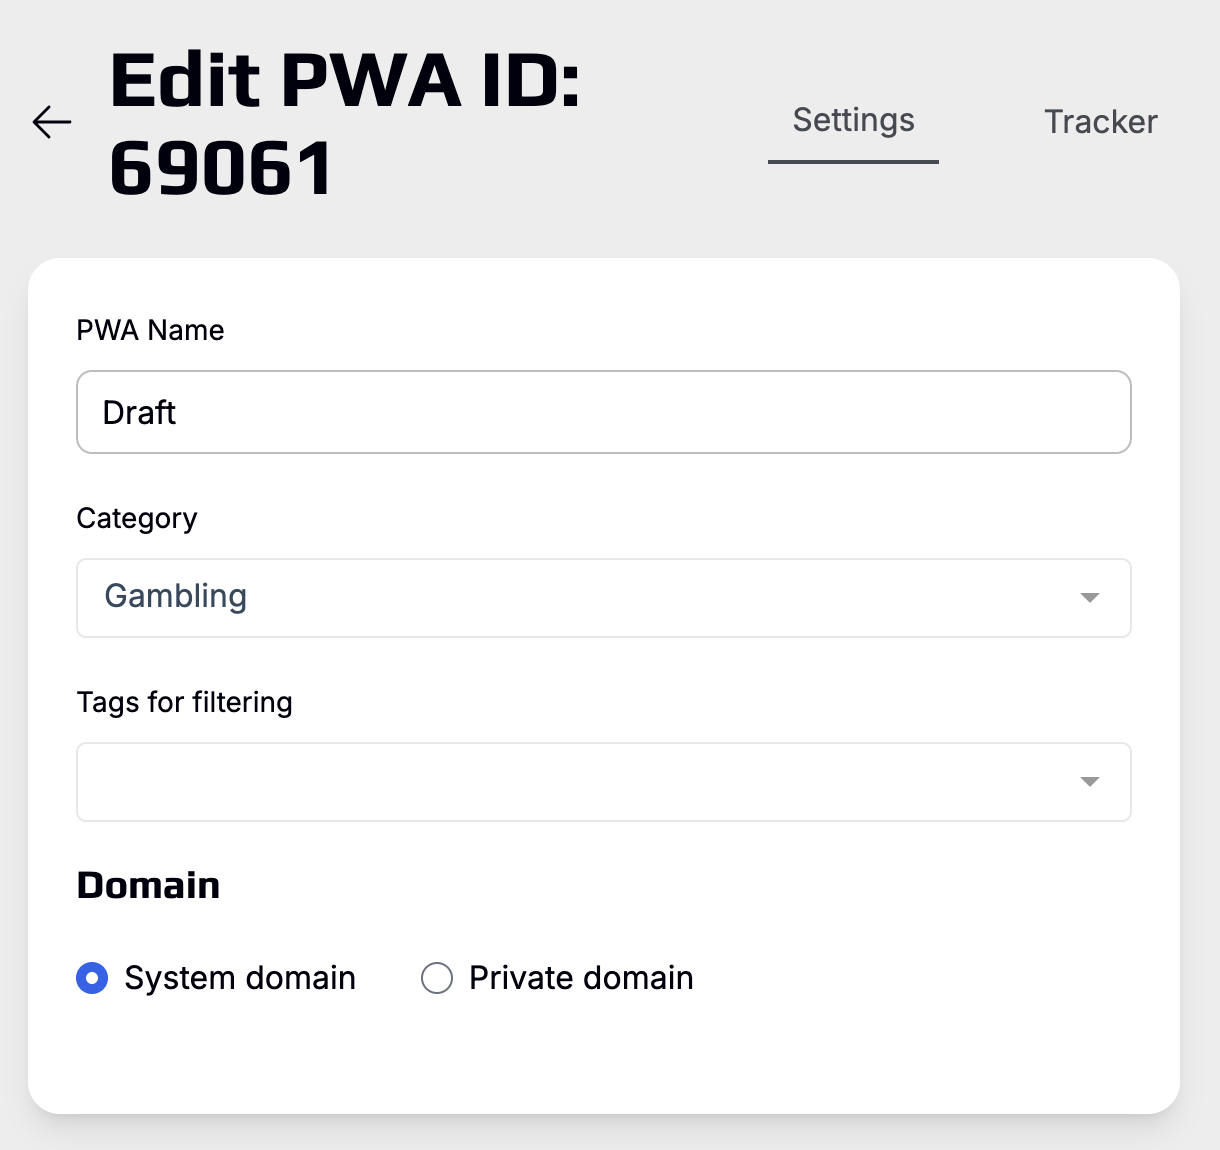
PWA Name Enter the name of your application. This name will be displayed in your project list and will help you easily identify the application. By default, a draft is created with the name "Draft," which can be changed to anything convenient.
Category Select the category your application belongs to. Available options include:
- • Gambling
- • Betting
- • Nutra
- • Dating
- • Trading
Proper category selection will help in organizing projects and applying appropriate settings.
Filtering tags Add tags for convenient filtering and searching of applications in your project list. This is especially useful when working with a large number of PWAs.
Domain configuration The platform offers two application hosting options:
System domain: (selected by default) The application will be hosted on one of EpicPWA's domains. This is a quick way to launch without the need to purchase your own domain. Private domain: You can connect your own domain for a more professional look and greater user trust. This will require purchasing a private domain in advance in the "Domains" section.
PUSH subscription collection
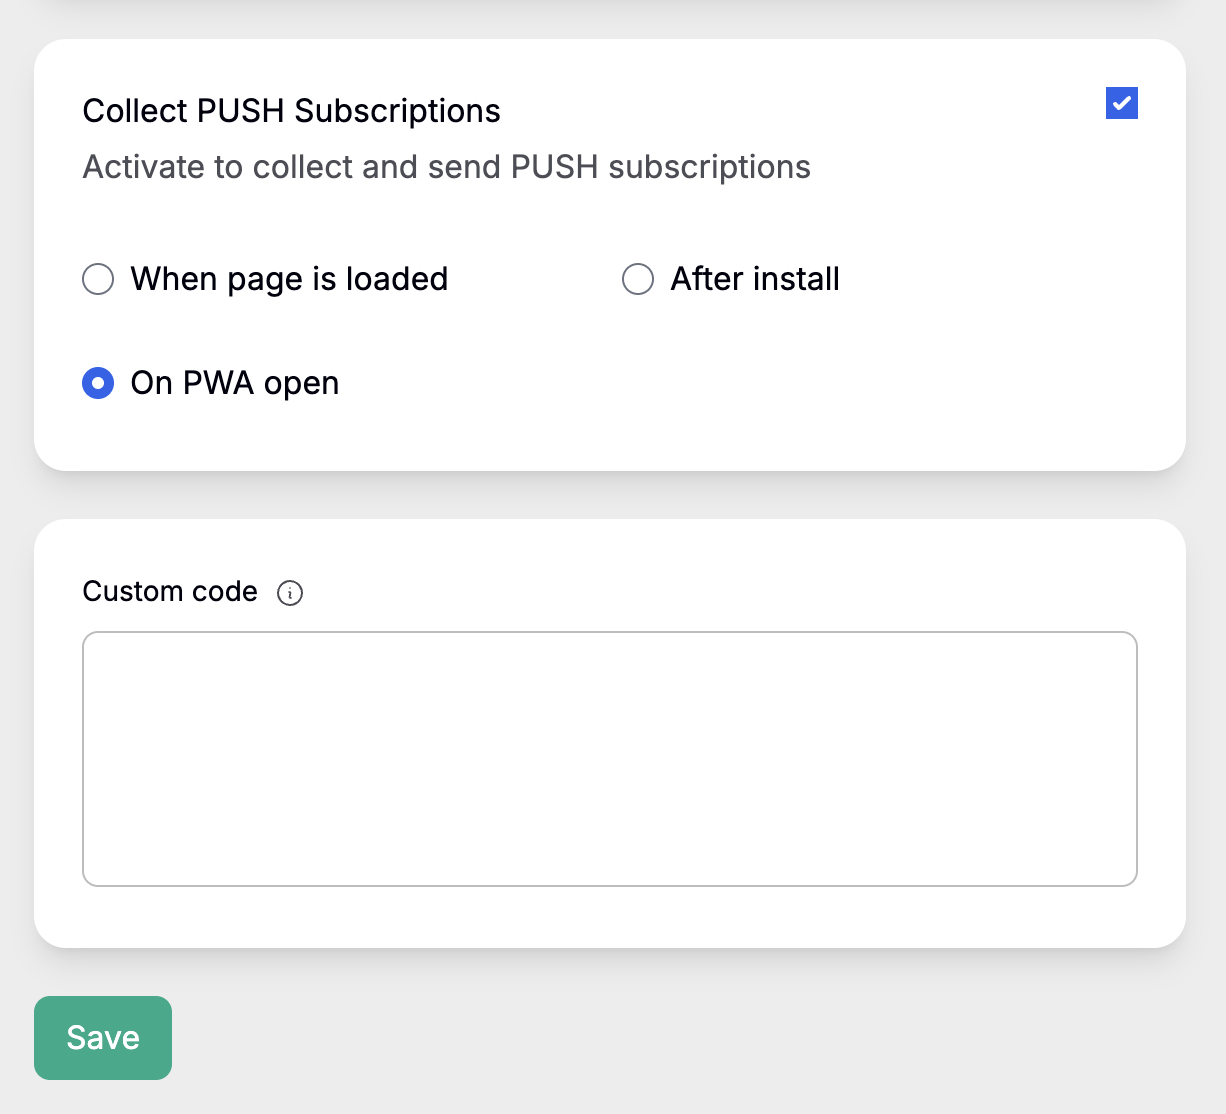
Activate the "Collect PUSH subscriptions" option to be able to send push notifications to your application users.
Choose when to request subscription:
- • On page load — request will appear immediately on first visit
- • After installation — request will appear after PWA installation on user's device
- • On PWA open — request will appear when launching the installed application
It is recommended to choose "On PWA open" option, as users who have already installed the application are more loyal and more willing to agree to receive notifications.
Custom code
In the "Custom code" field, you can add your own scripts that will run on your PWA pages. This allows you to integrate analytics, chatbots, and other tools.
After filling in all necessary fields, click the "Save" button to save settings.
Tracker configuration
On this tab, geographic traffic filtering and link management for different application usage scenarios are configured.
GEO and links
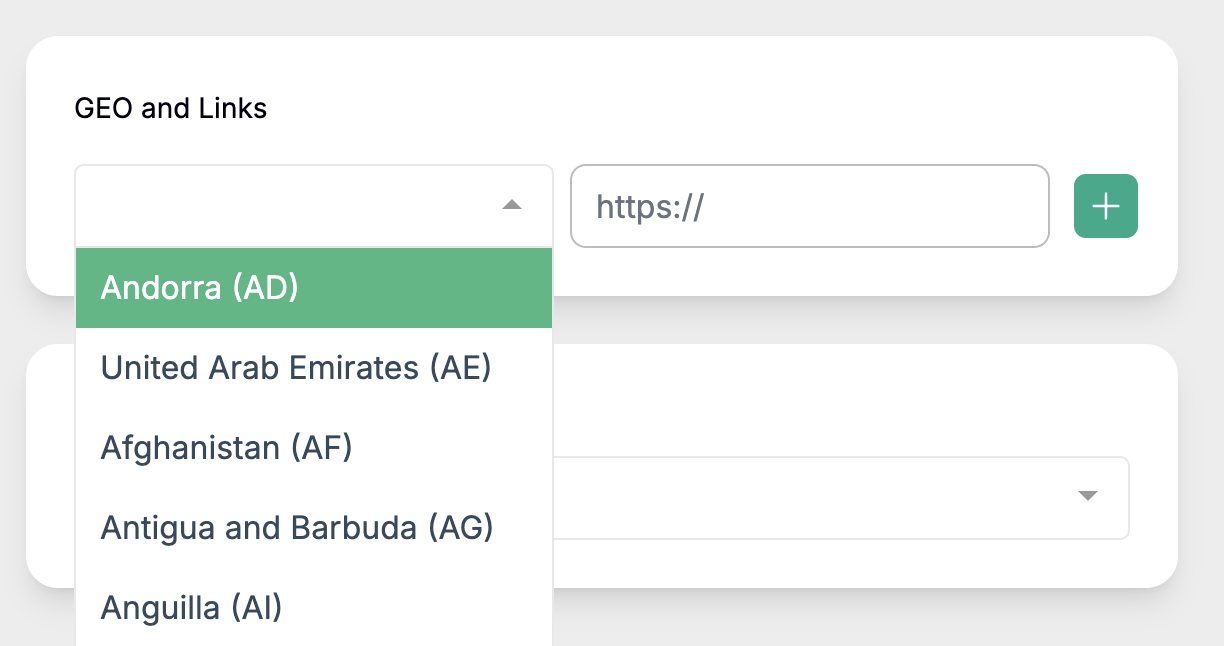
Target country selection In the left dropdown list, select the countries whose traffic you want to direct to a specific link.
URL for redirect In the right field, specify the link to which users from selected countries will be redirected. This can be a link to a partner offer, landing page, or any other target page.
Use the "+" button on the right to add additional rules for other GEOs and links.
Cloaking settings
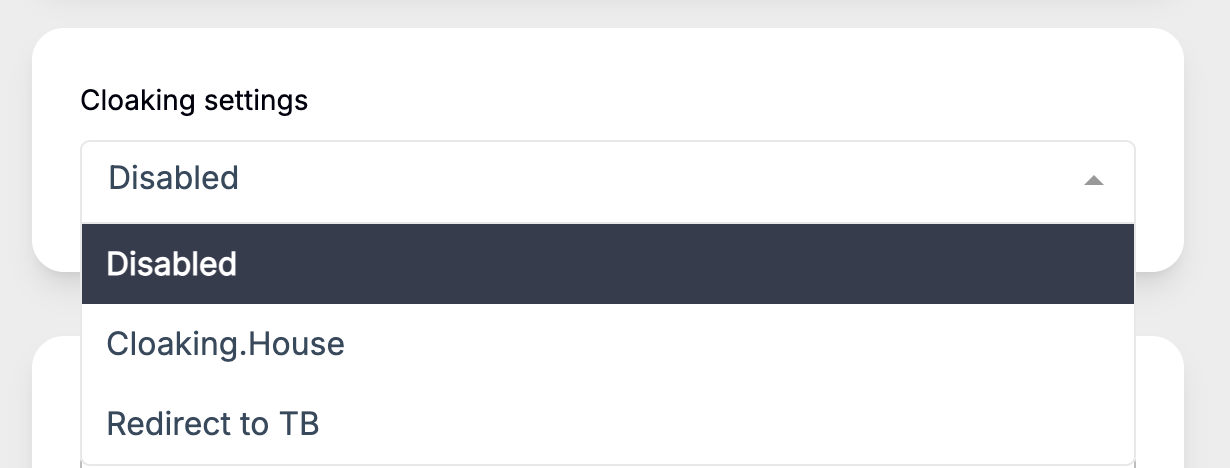
Cloaking is a technology for separating and distributing traffic that allows showing different content to users and advertising network moderators.
Cloaking service selection
The platform supports the following options:
Disabled — cloaking is disabled, all users see identical content Cloaking.House — integration with flow in Cloaking.House Redirect to TB — redirect to traffic back
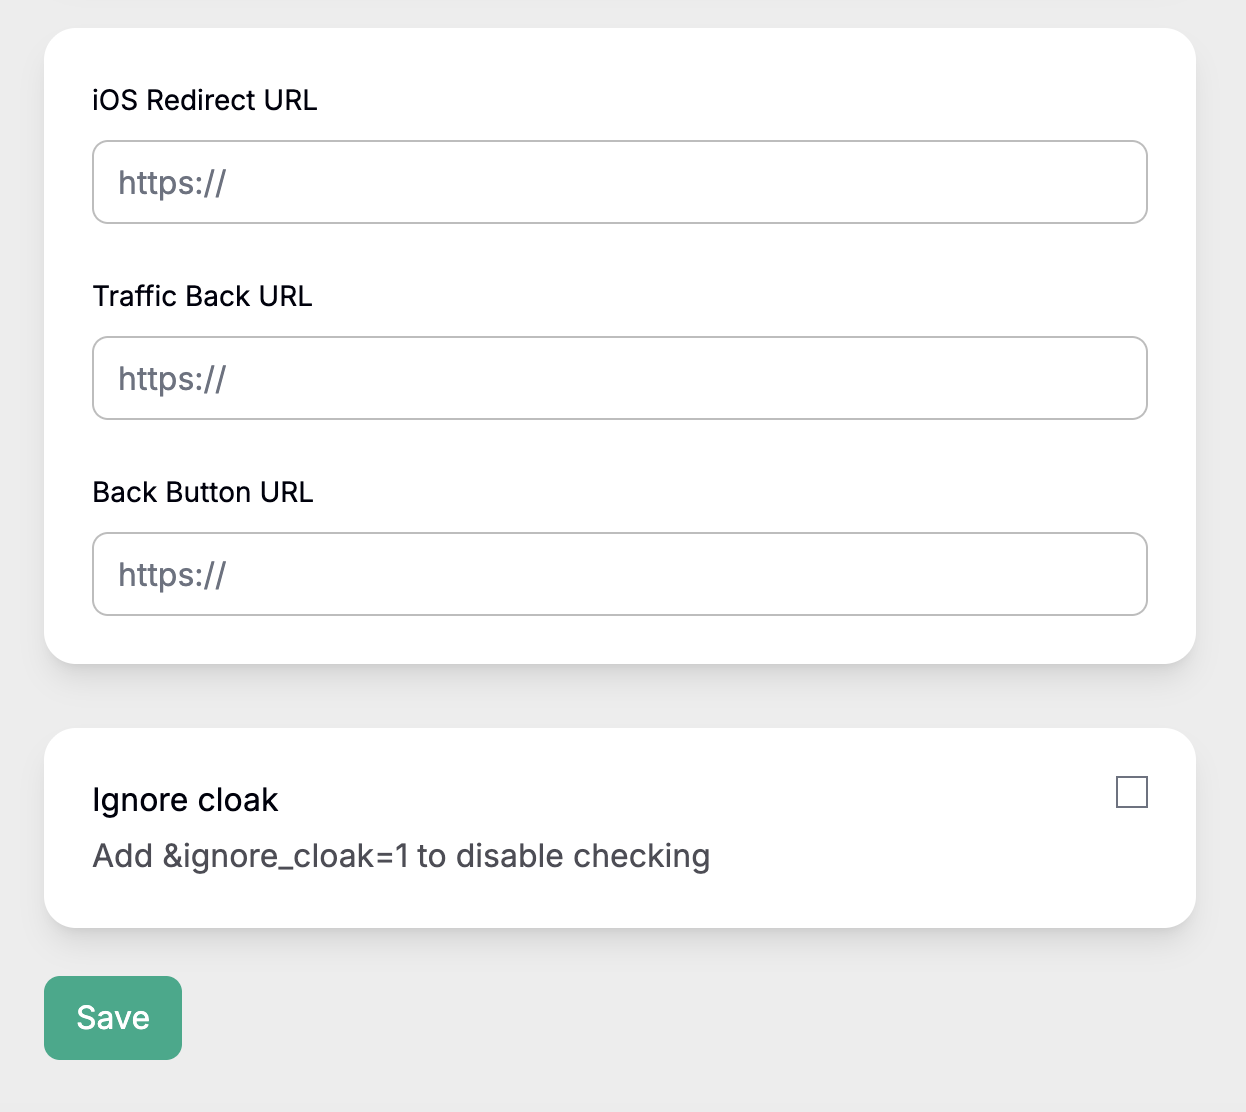
iOS Redirect URL: Specify the URL to which iOS device users will be redirected.
Traffic Back URL: Set a link for traffic back — a page to which users who did not pass cloaking verification (moderators, bots, non-target traffic) will be redirected. Usually this is a white page or safe content.
Ignore Cloaking
Enable the "Ignore cloaking" checkbox if you want to disable cloaking verification for specific cases.
Tip: Add the parameter &ignore_cloak=1 to your link to temporarily disable cloaking verification. This is useful when testing the application or checking offer performance. After completing the setup, click the "Save" button to save changes.
Selecting an Application Template
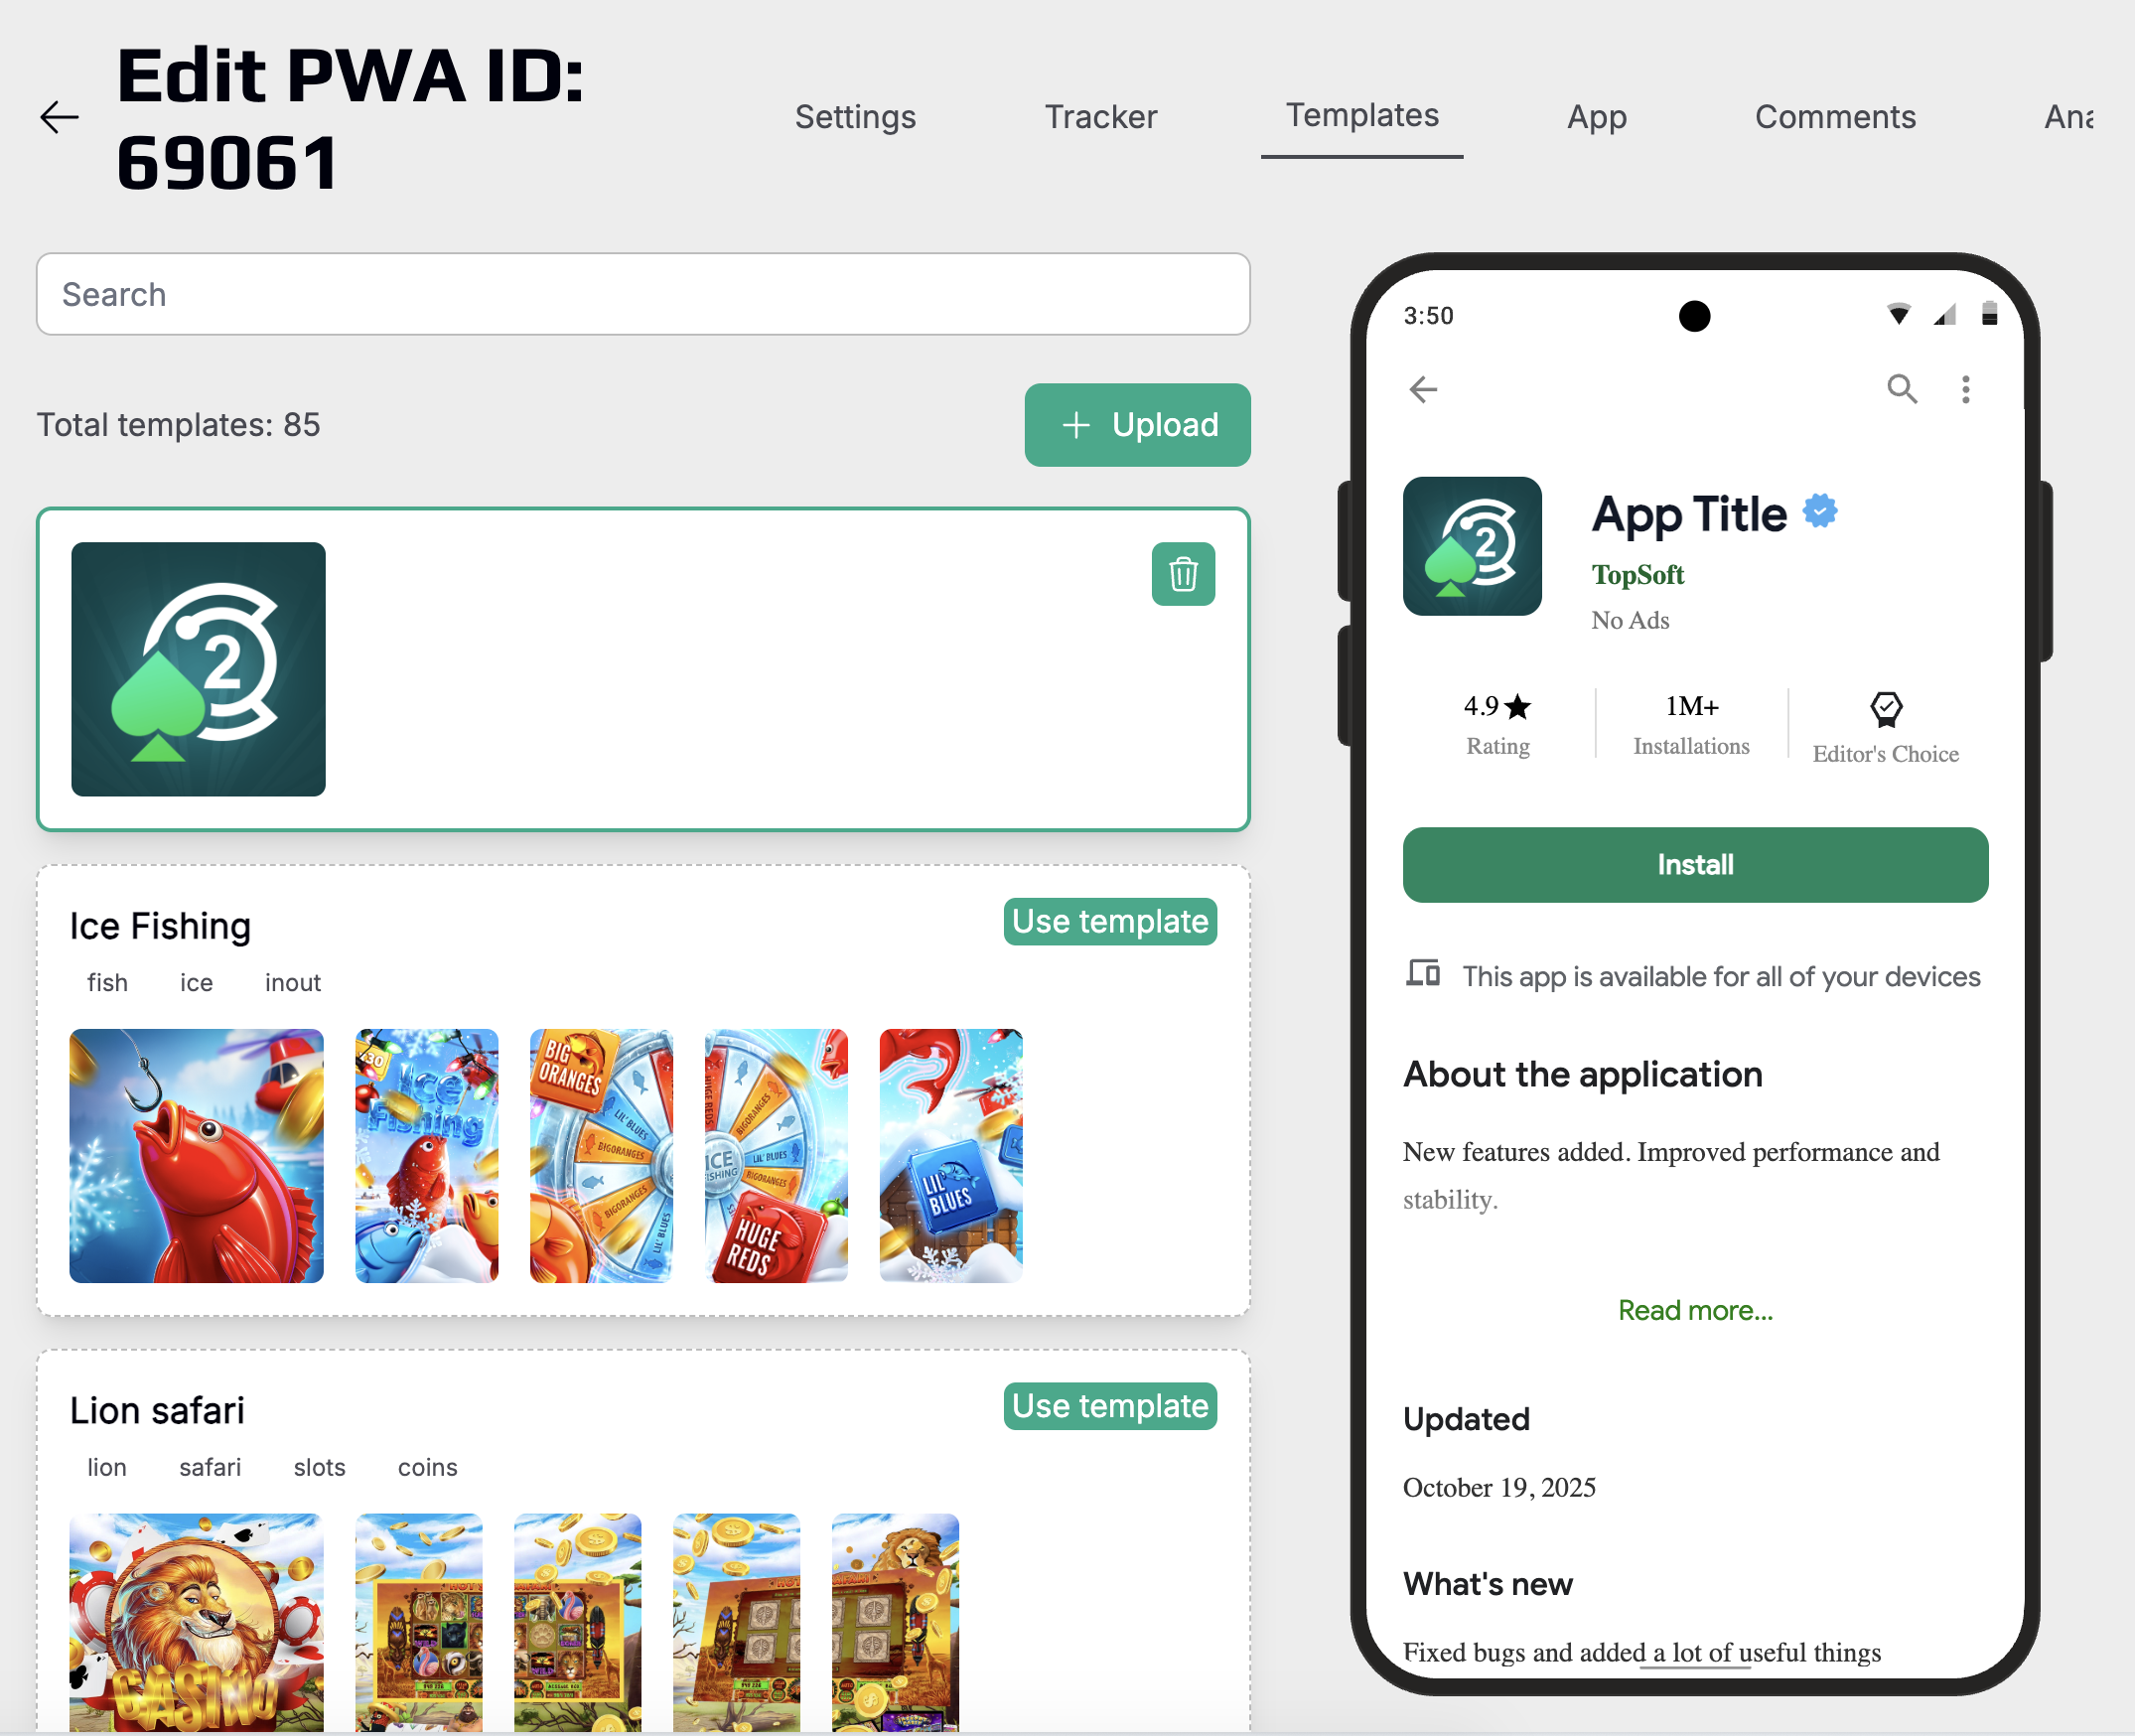
The "Template" tab allows you to select a ready-made design for your PWA application or upload your own images. A preview of how the application will look on the user's device is displayed on the right.
Ready-Made Templates
The platform offers a library of 85+ ready-made templates for various niches. Each template includes:
- • Ready-made application icon
- • Set of preview screenshots
- • Optimized images
How to select a template:
- • Use the "Search" field at the top of the page for quick search of the desired template
- • Browse available options — each template has a name and tags for filtering
- • Click the "Use template" button under the design you like
Uploading Your Own Images
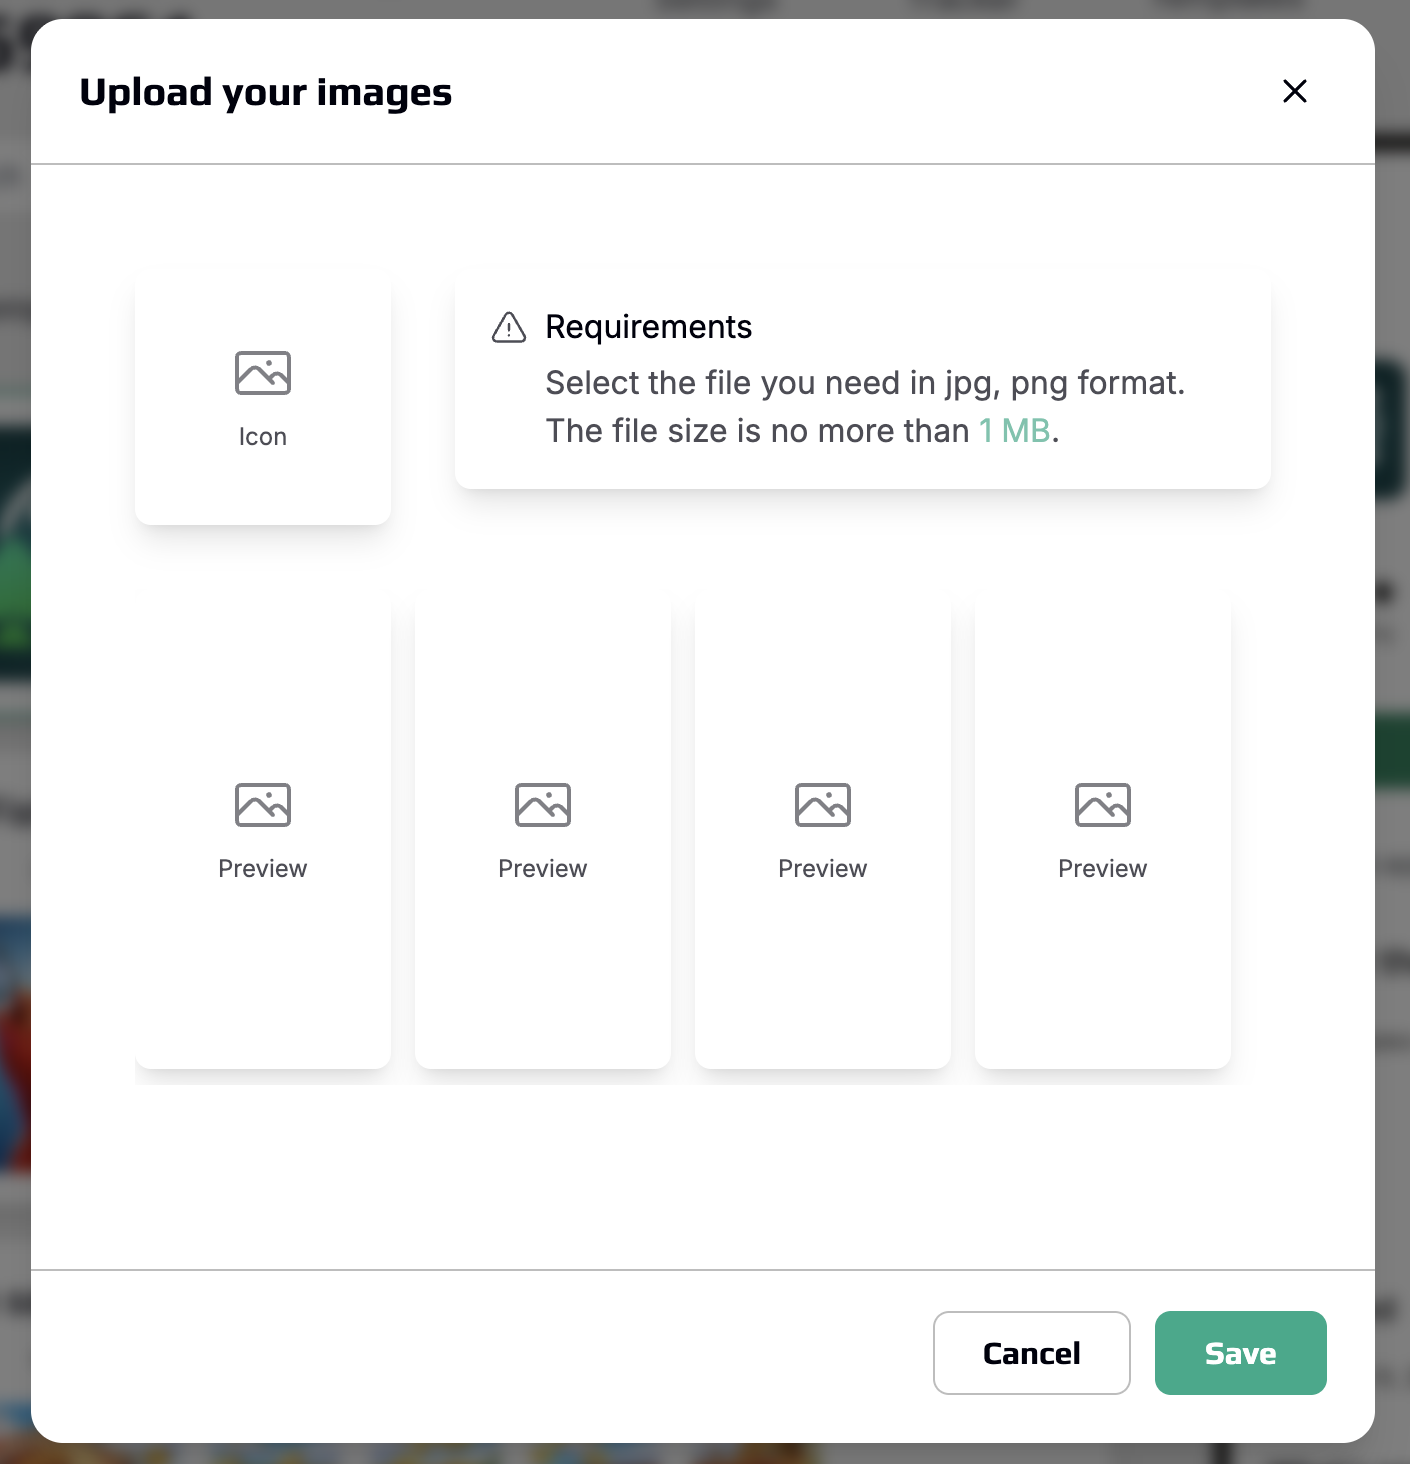
If ready-made templates don't suit you, you can create a unique design by uploading your own images.
Click the "+ Upload" button in the upper right corner. An upload window will open where you need to add an icon and 4 preview images.
After uploading all necessary images, click "Save" to apply changes.
Tip: Use high-quality and attractive images — they directly affect the conversion rate of application installations.
Configuring Application Content
The "Application" tab allows you to configure in detail all the information that will be displayed in your PWA application card. Here you can customize each element of the installation page.
Main
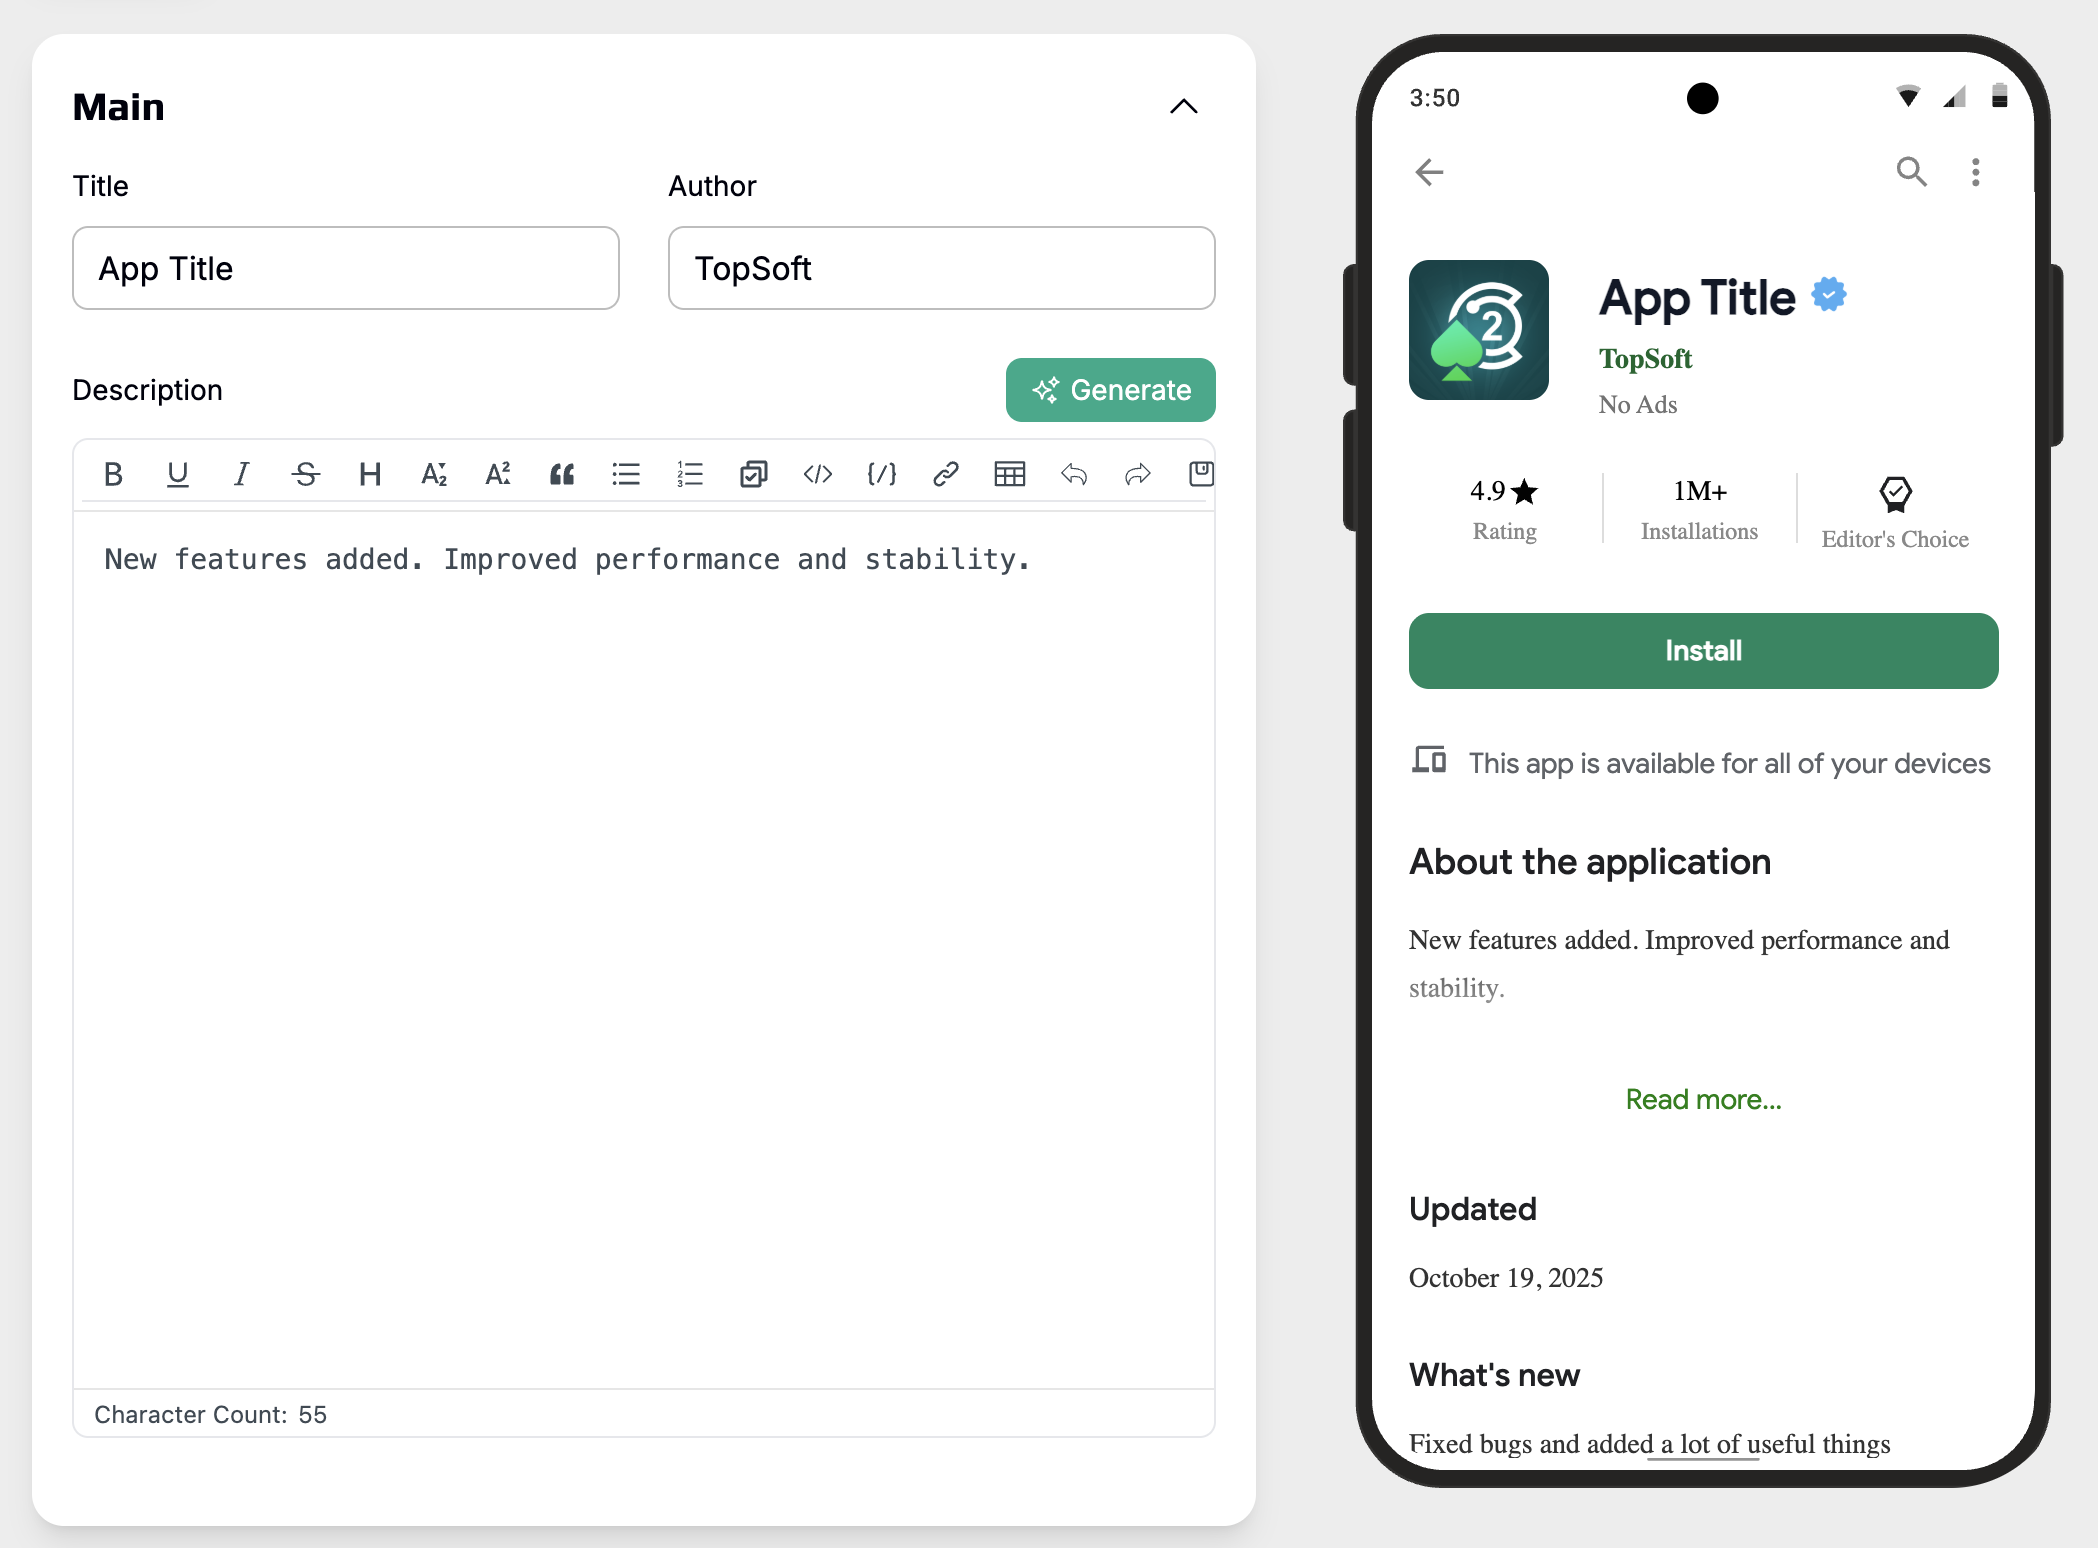
The "Main" block contains key elements that are displayed at the top of the application card.
Title: Enter the name of your application that will be displayed to users. This is the main name that users will see when installing the PWA.
Author: Specify the name of the developer or company. This name is displayed under the application title and helps establish trust.
Description
In the text editor, enter the main description of the application.
To the right of the "Description" field is the "✨ Generate" button — this is an AI function that can automatically create an application description based on the selected category and theme.
At the bottom of the editor, a character counter is displayed so you can control the length of the description.
All changes are immediately reflected in the preview on the right, where you can see how the application will look to users.
Basic Block
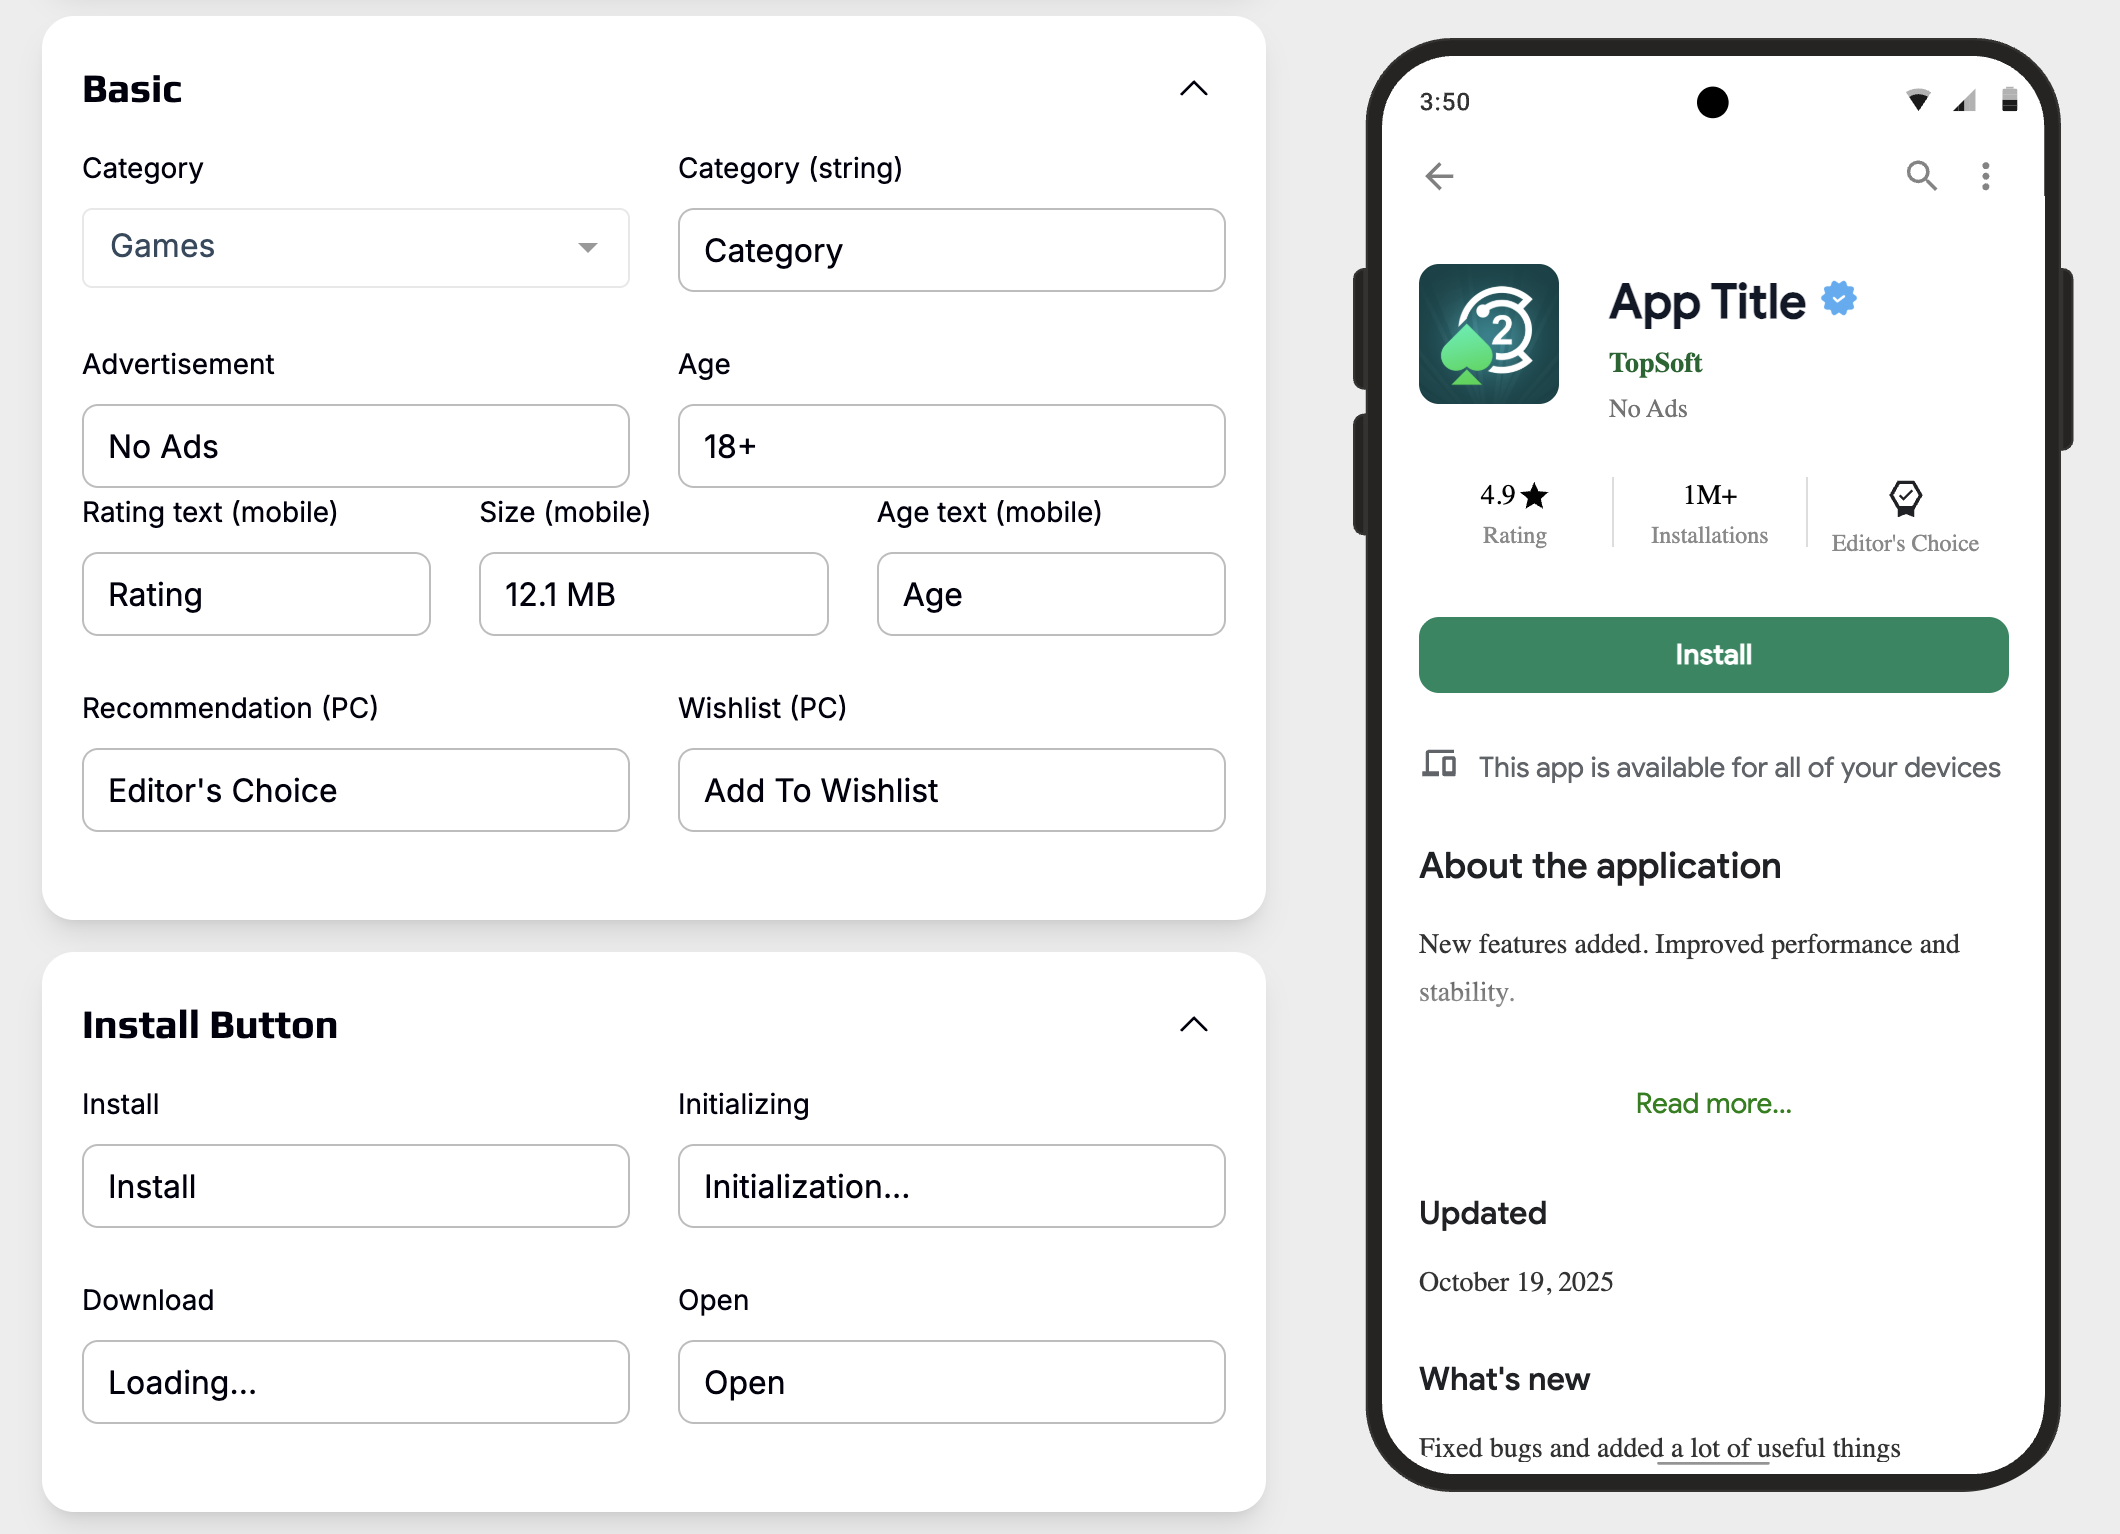
Category: Select the application category from the dropdown list.
Category (string): Specify the text name of the category that will be displayed to users (for example, "Entertainment").
Advertisement: Enter information about the presence of advertising in the application. Default value: "No Ads" (no advertising).
Age: Specify the age restriction.
Rating text (mobile): Text that will be displayed under the rating on mobile devices.
Size (mobile): Specify the application size.
Age text (mobile): Text description of the age restriction for the mobile version.
Recommendation (PC): Recommendation badge for the desktop version.
Wishlist (PC): Text for the add to favorites button.
Install Button
Install: Text for the application install button.
Initialize: Text displayed during application preparation for installation.
Download: Text for the download process.
Open: Text for the button to launch the installed application.
Description
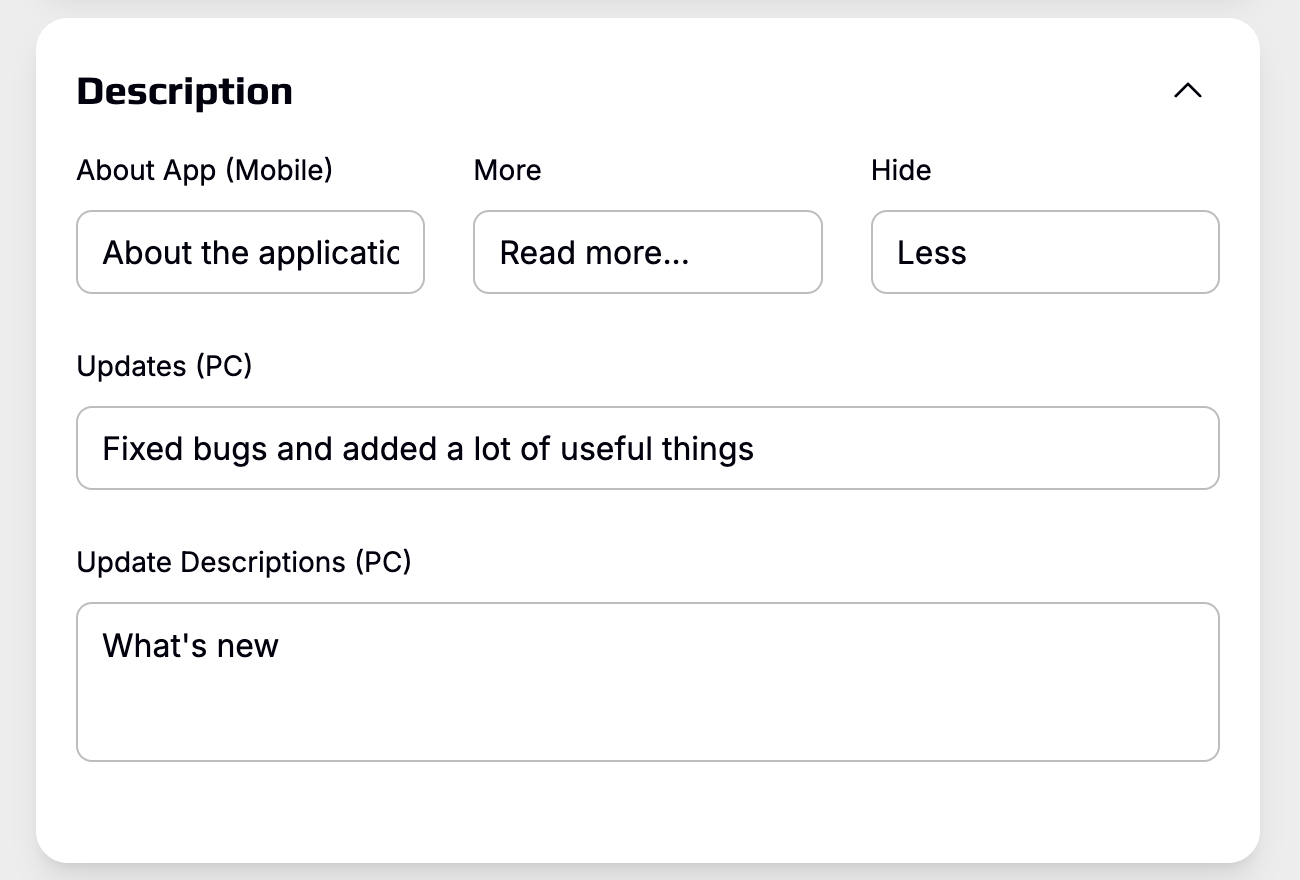
About the application (Mobile): Brief description of the application for mobile devices. Displayed in the "About the application" block.
More: Text for the "Expand description" button.
Hide: Text for the "Collapse description" button.
Updates (PC): Description of the latest update for the desktop version (for example, "Fixed bugs and added a lot of useful things").
Update descriptions (PC): Header of the block with update description (for example, "What's new").
Rating
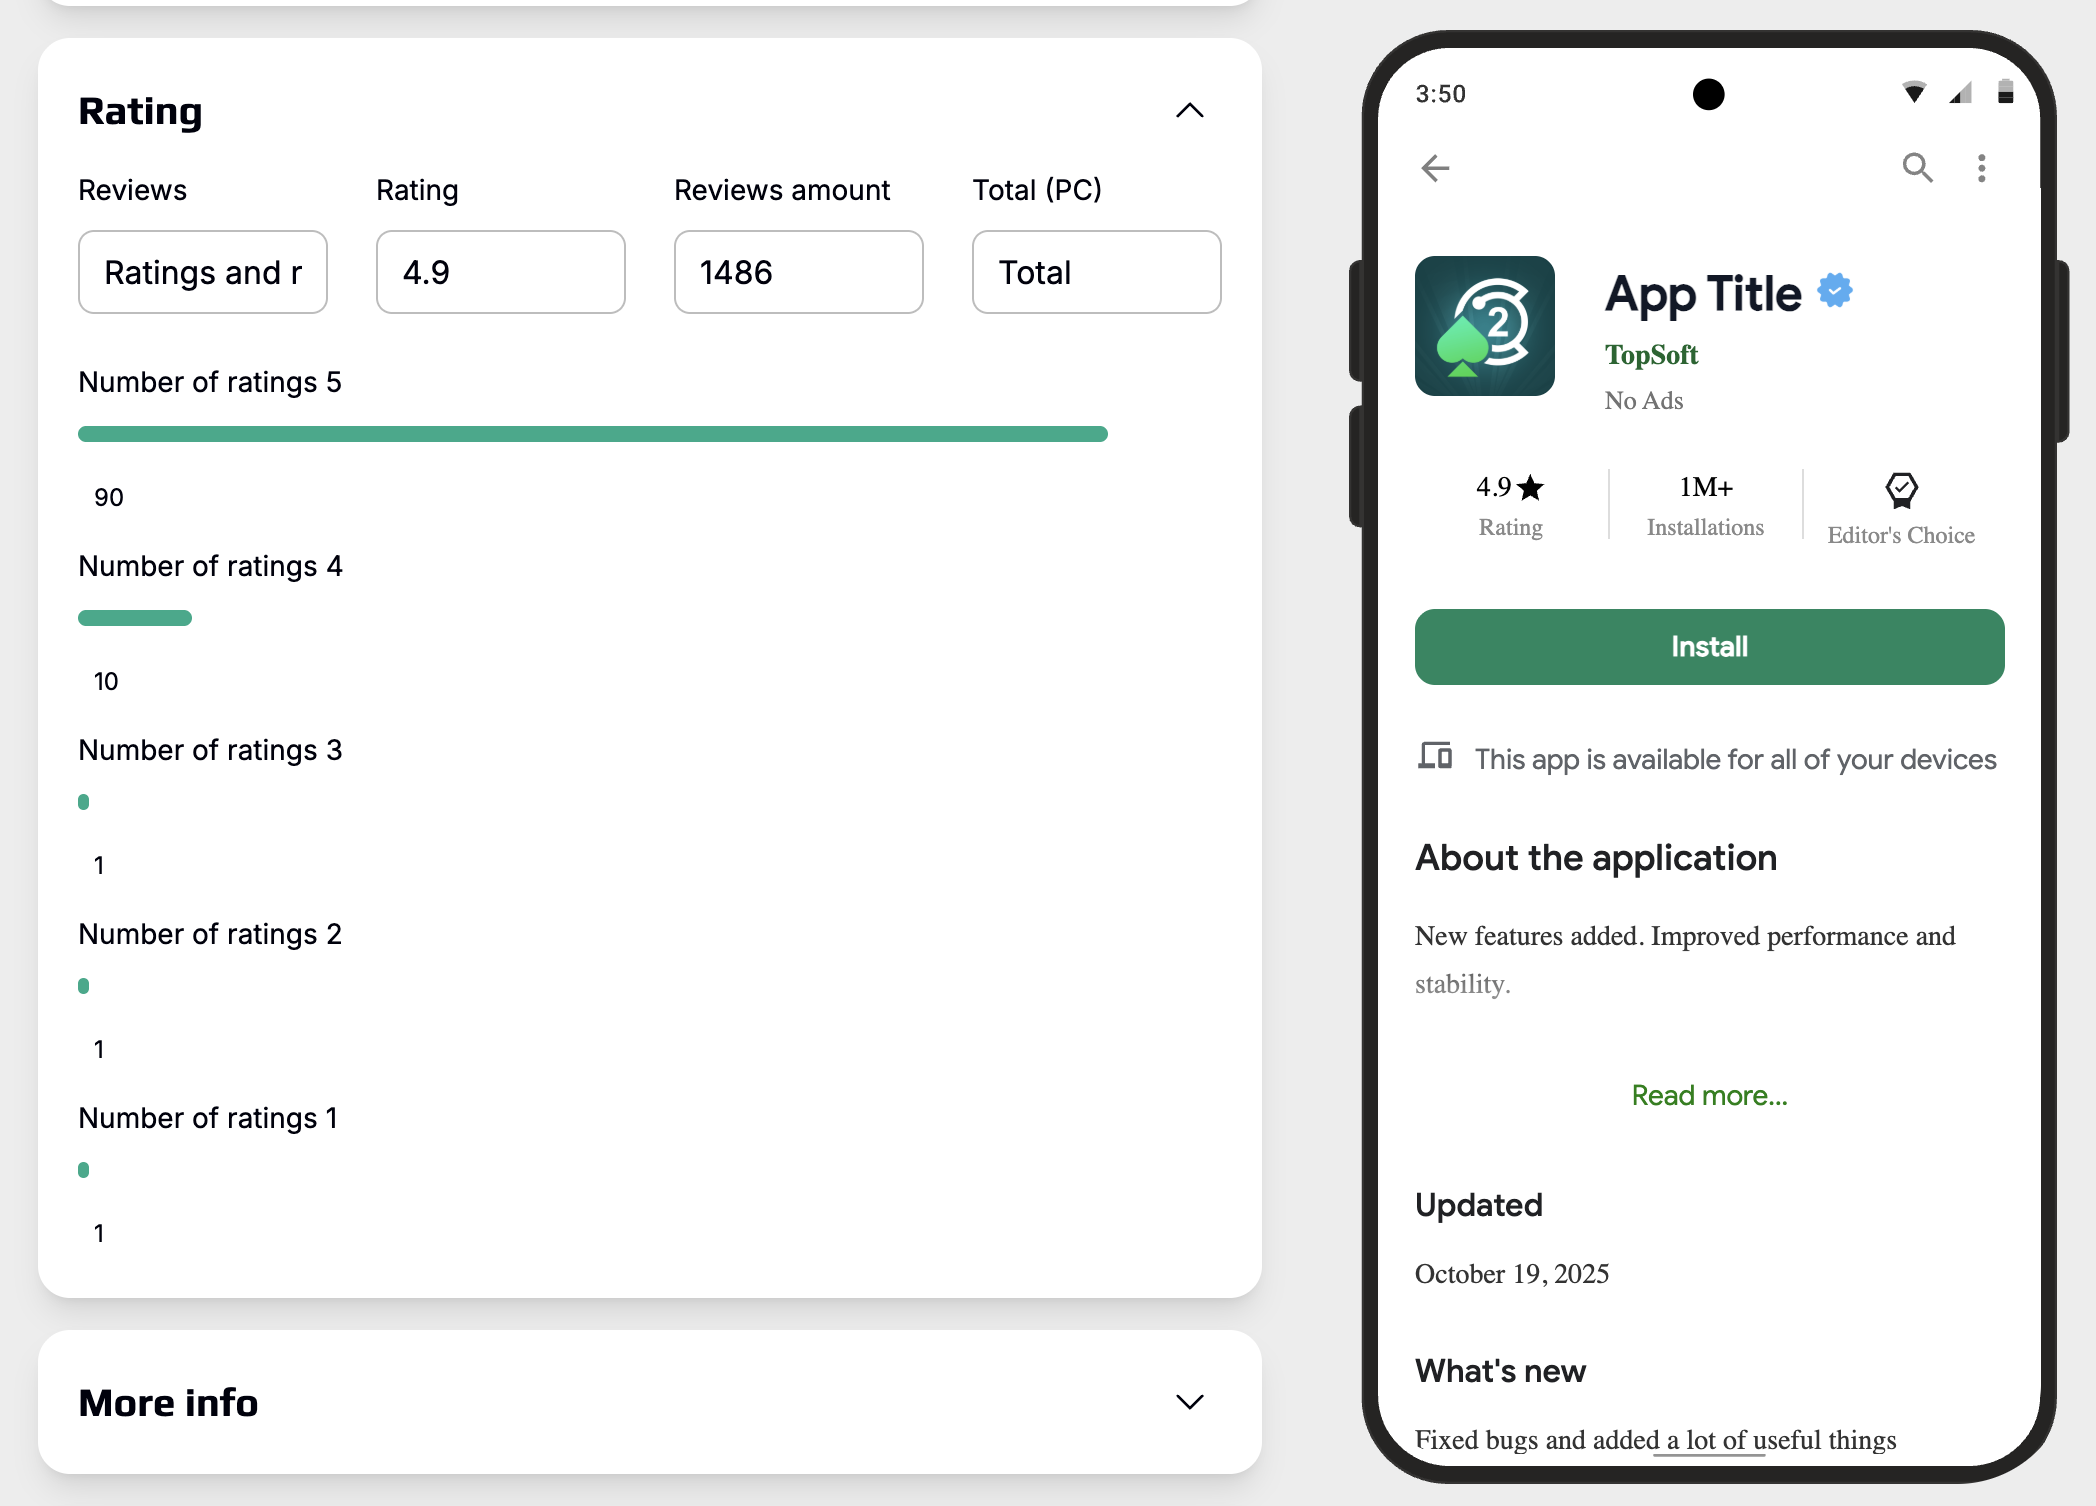
Configure the rating and review display block:
Reviews: Text for the reviews section header.
Rating: Specify the average application rating.
Number of reviews: Total number of reviews.
Total (PC): Text for the total value.
Number of ratings 5, 4, 3, 2, 1: Distribution of ratings by stars with numerical values. This creates a visualization of the review distribution.
More Info
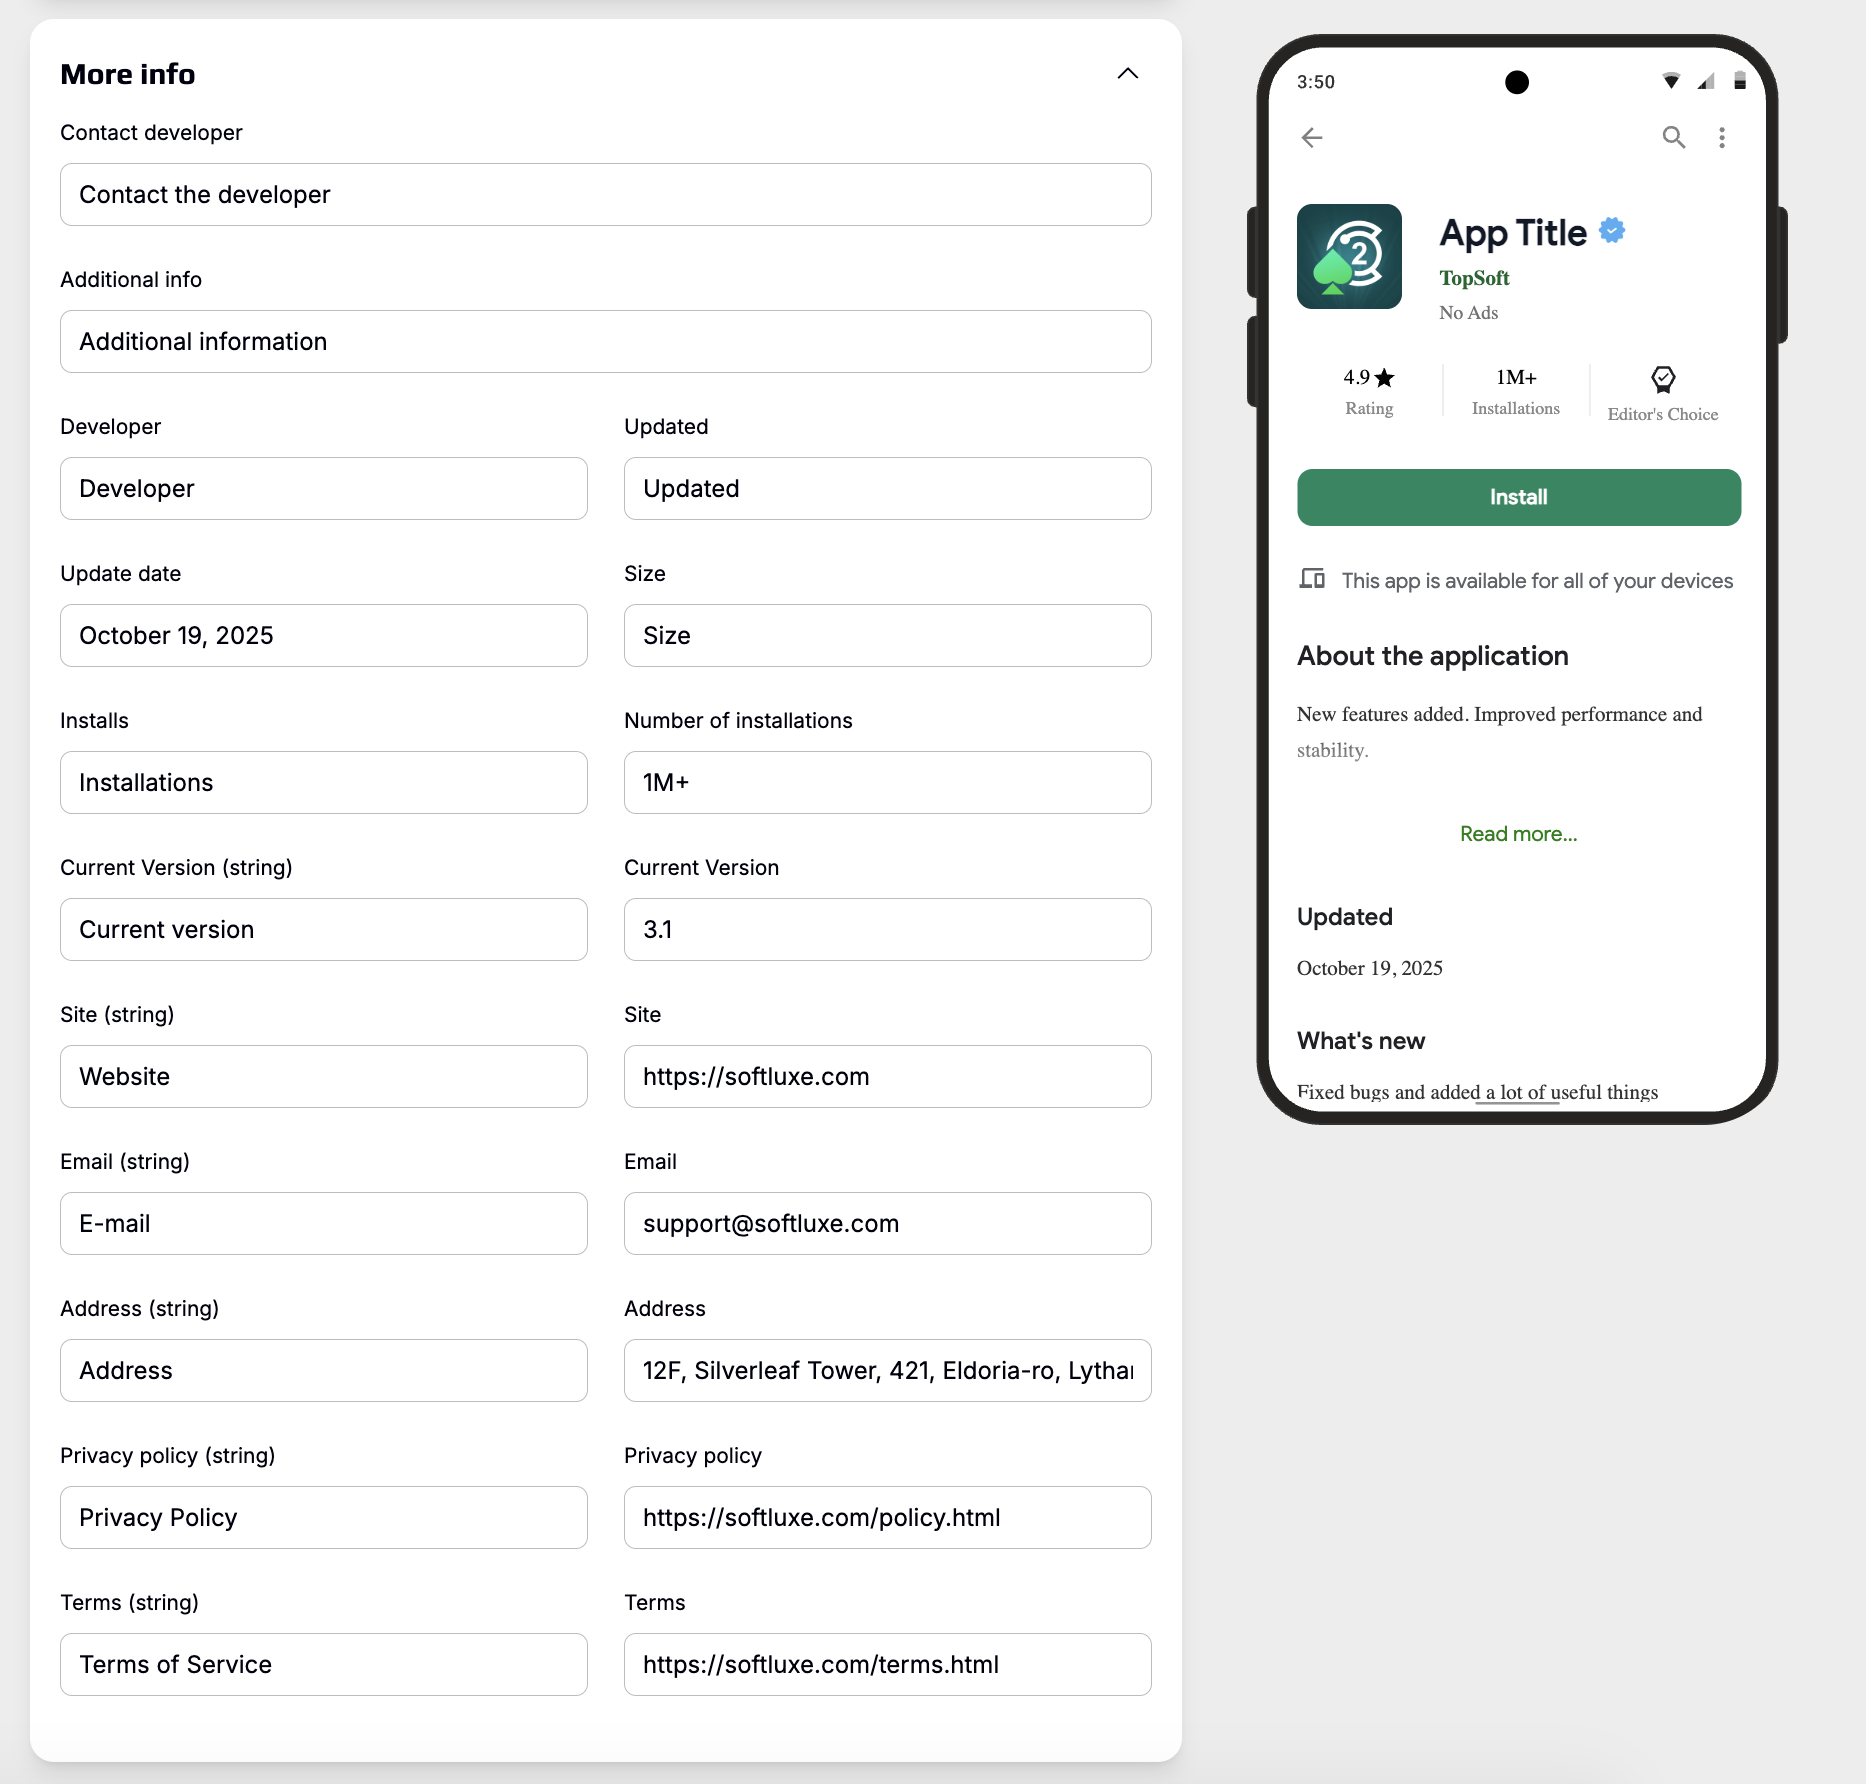
Developer contact: Link or text for contacting support.
Additional information: Header for the additional information block.
Developer: Name of the developer.
Updated: Header for the update date.
Update date: Specific date of the last update.
Size: Header for the application size.
Installs: Header for the number of installations.
Number of installations: Value of installations.
Current version (string): Header for the current version.
Current version: Application version number.
Website (string) / Website: Link to the application website.
Email (string) / Email: Contact email for communication.
Address (string) / Address: Physical address of the developer or company.
Cookies
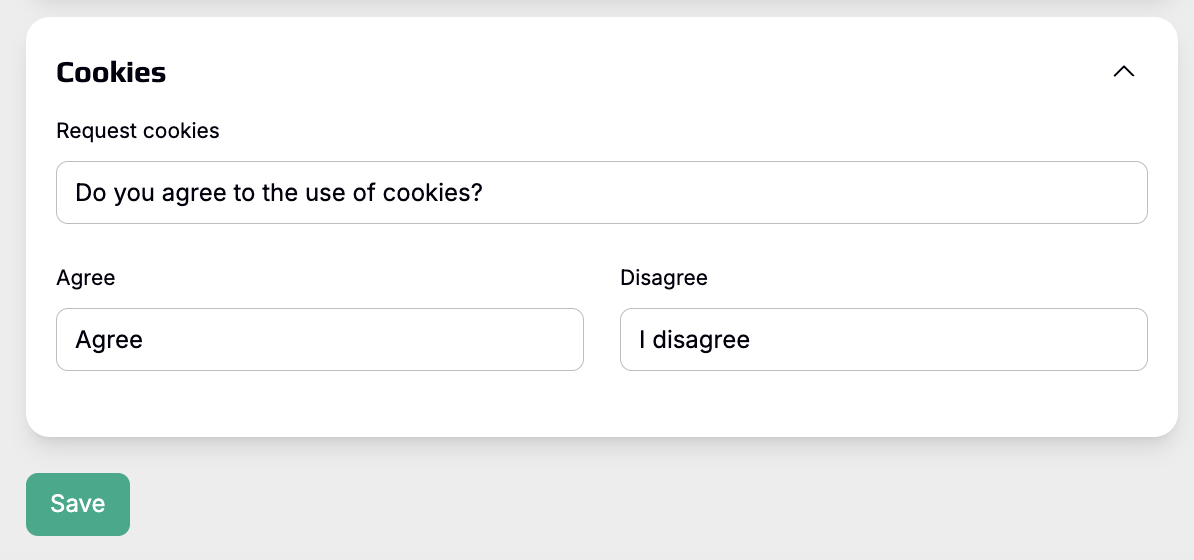
Configure the cookie consent request:
Cookie request: Text for the cookie notification.
Accept: Text for the consent button.
Decline: Text for the decline button.
Multilingualism and Localizations
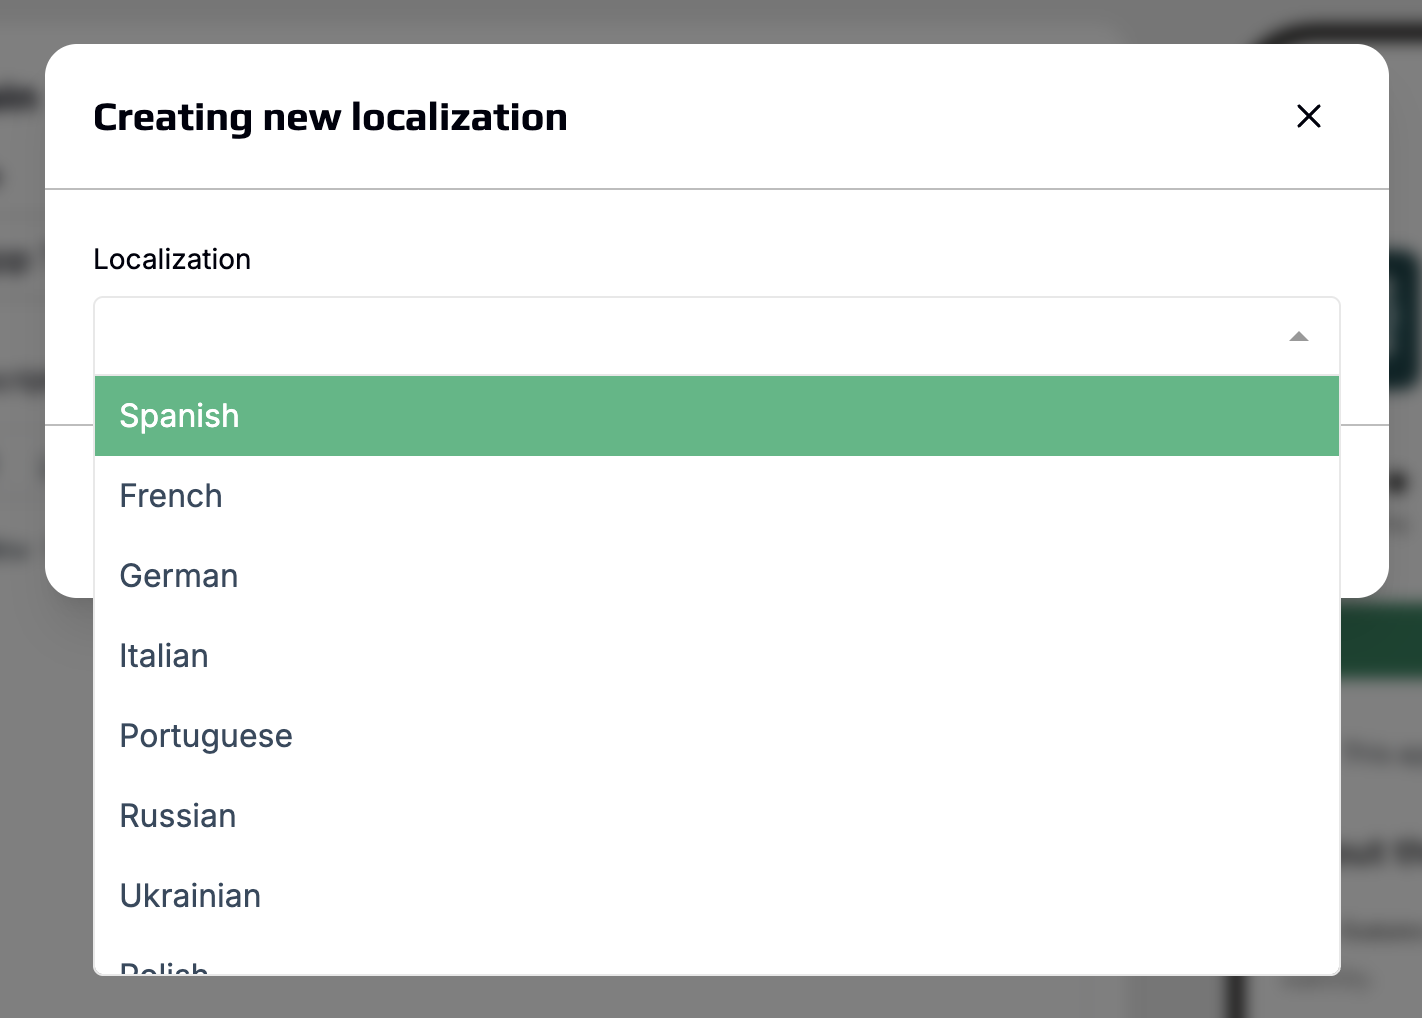
The EpicPWA platform supports creating applications in different languages. You can add multiple localizations for targeting different markets.
Creating a New Localization
Click the add localization button and select the desired language from the list. For each localization, you will be able to fill in all the same fields as for the main language: description, buttons, rating, contact information. This allows you to create fully adapted versions of the application for each market.
Tip: Quality localization significantly increases conversion to installations for target audiences from different countries.
Configuring Comments
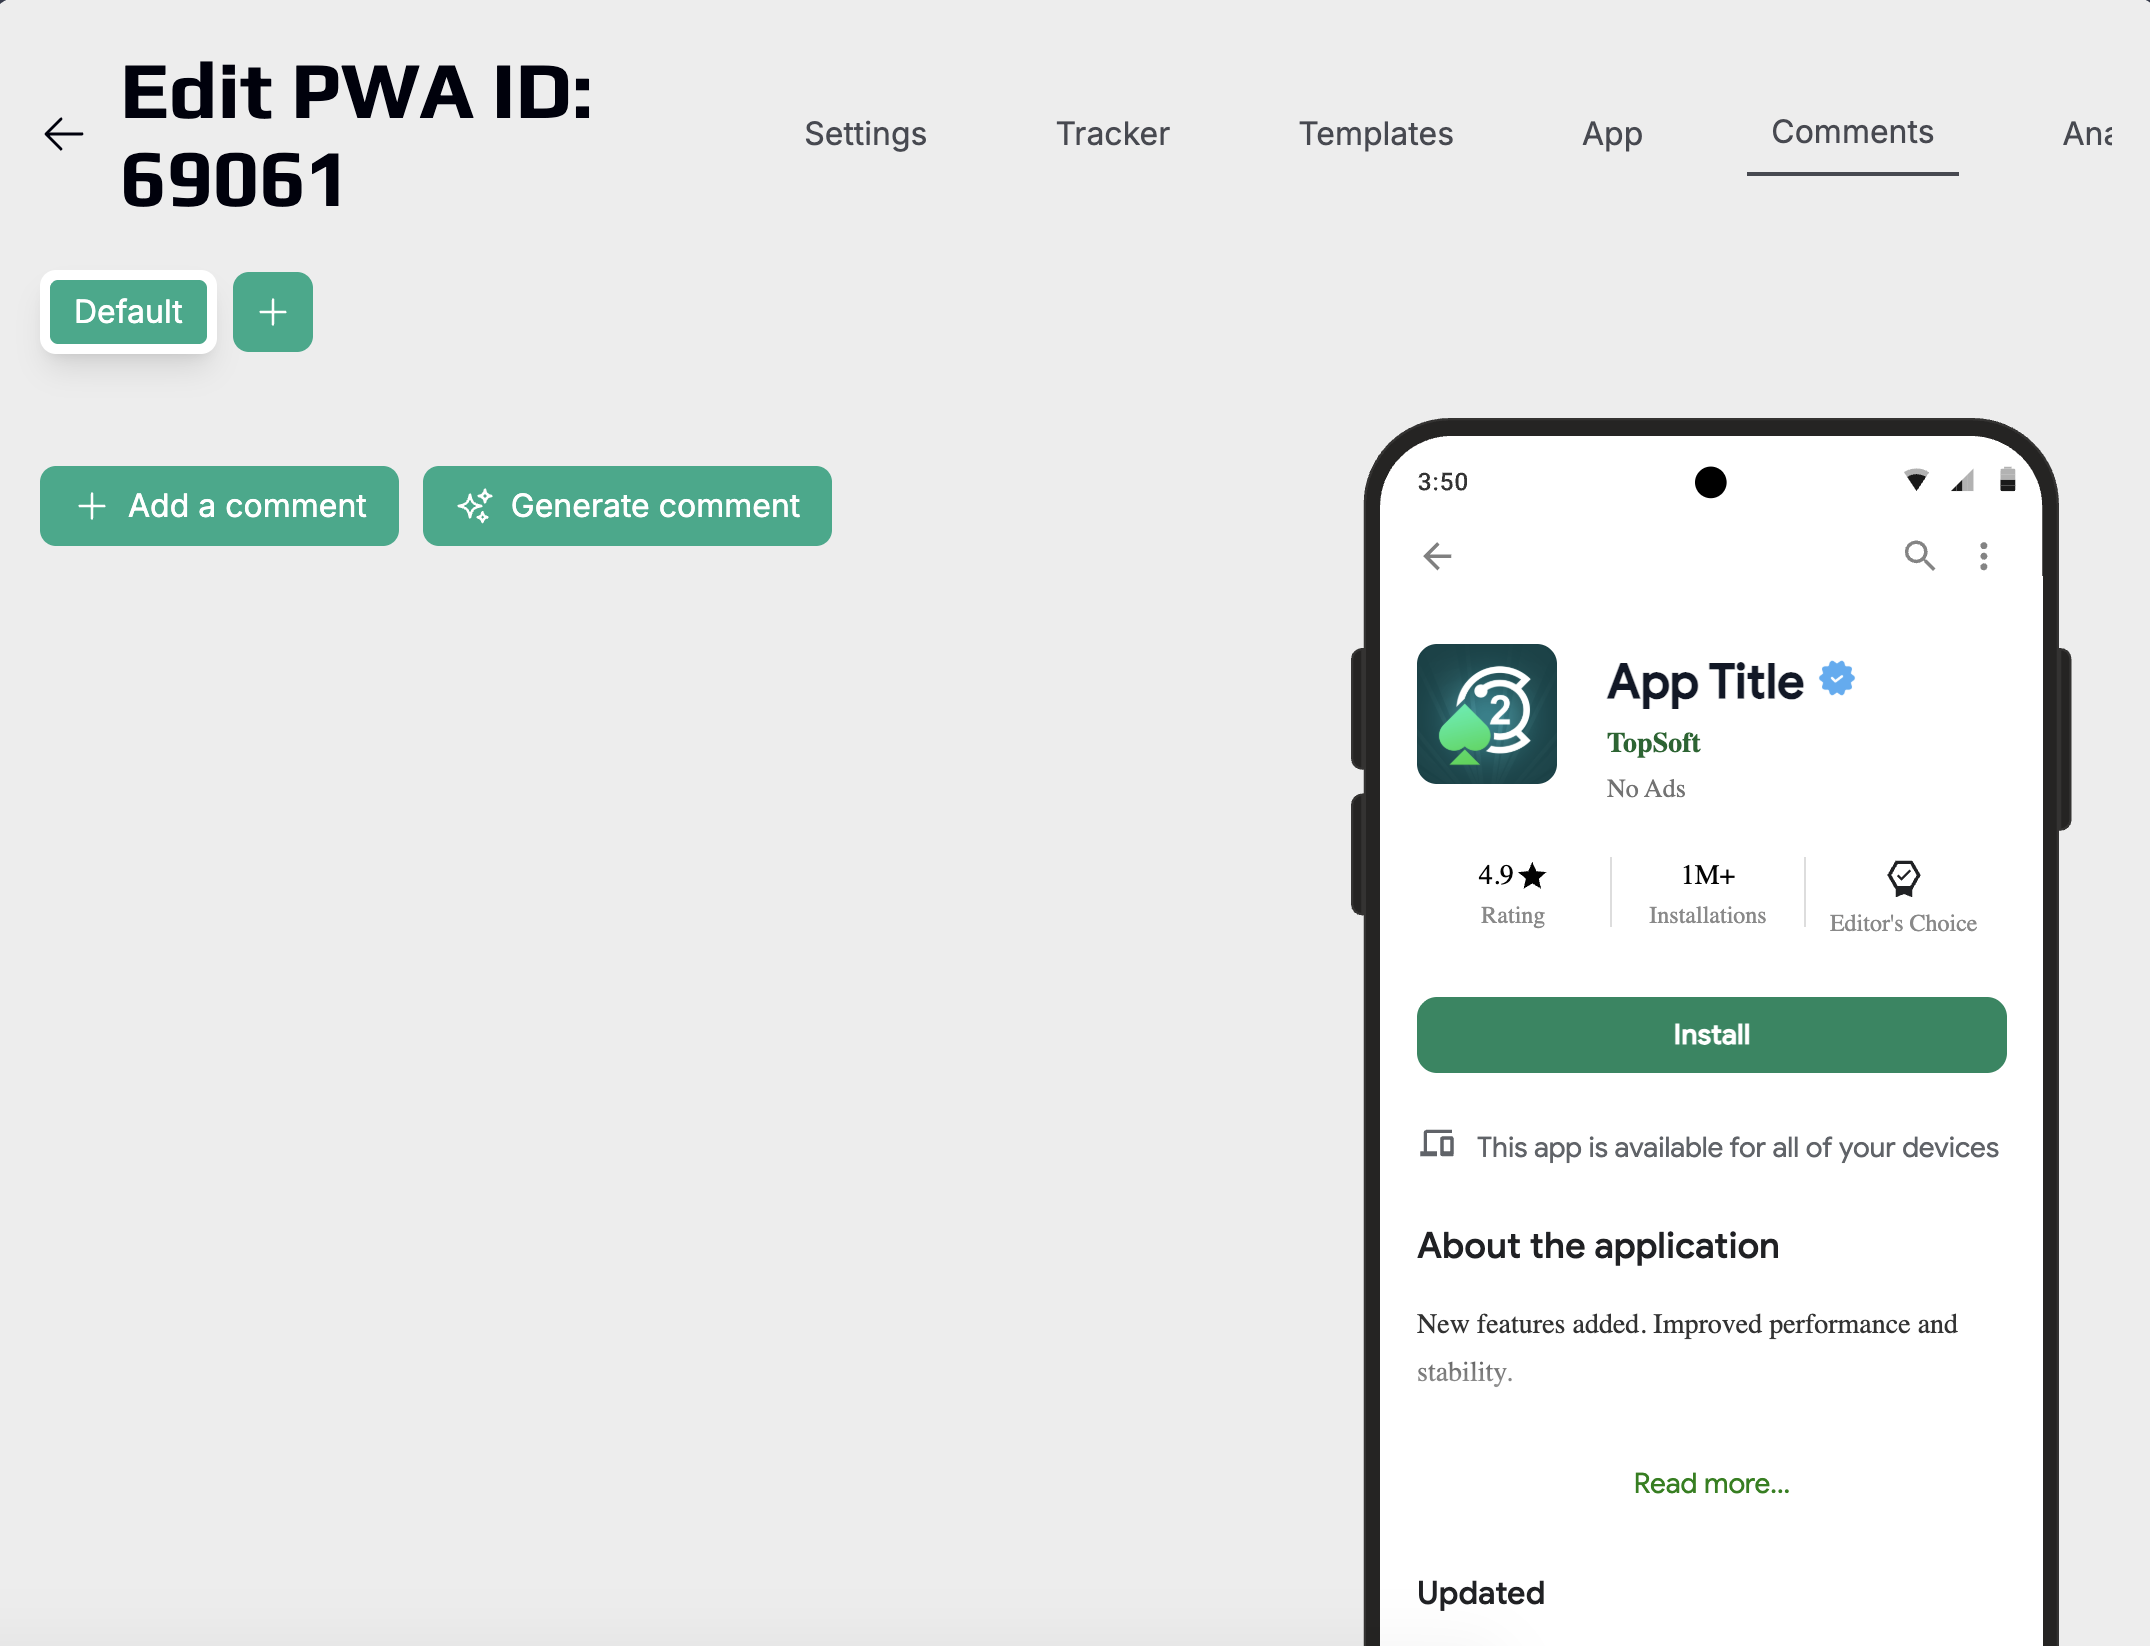
Next on the list is the "Comments" tab, which allows you to add user reviews and comments to your application. This helps create social proof and increase trust among potential users.
Adding Comments
The platform offers two ways to add reviews:
Add comment: Manual creation of a review with full control over all parameters.
✨ Generate comment: AI generation of realistic reviews based on your application's theme.
Tip: By clicking on + you can create comment localizations for the language you need.
Creating a New Comment
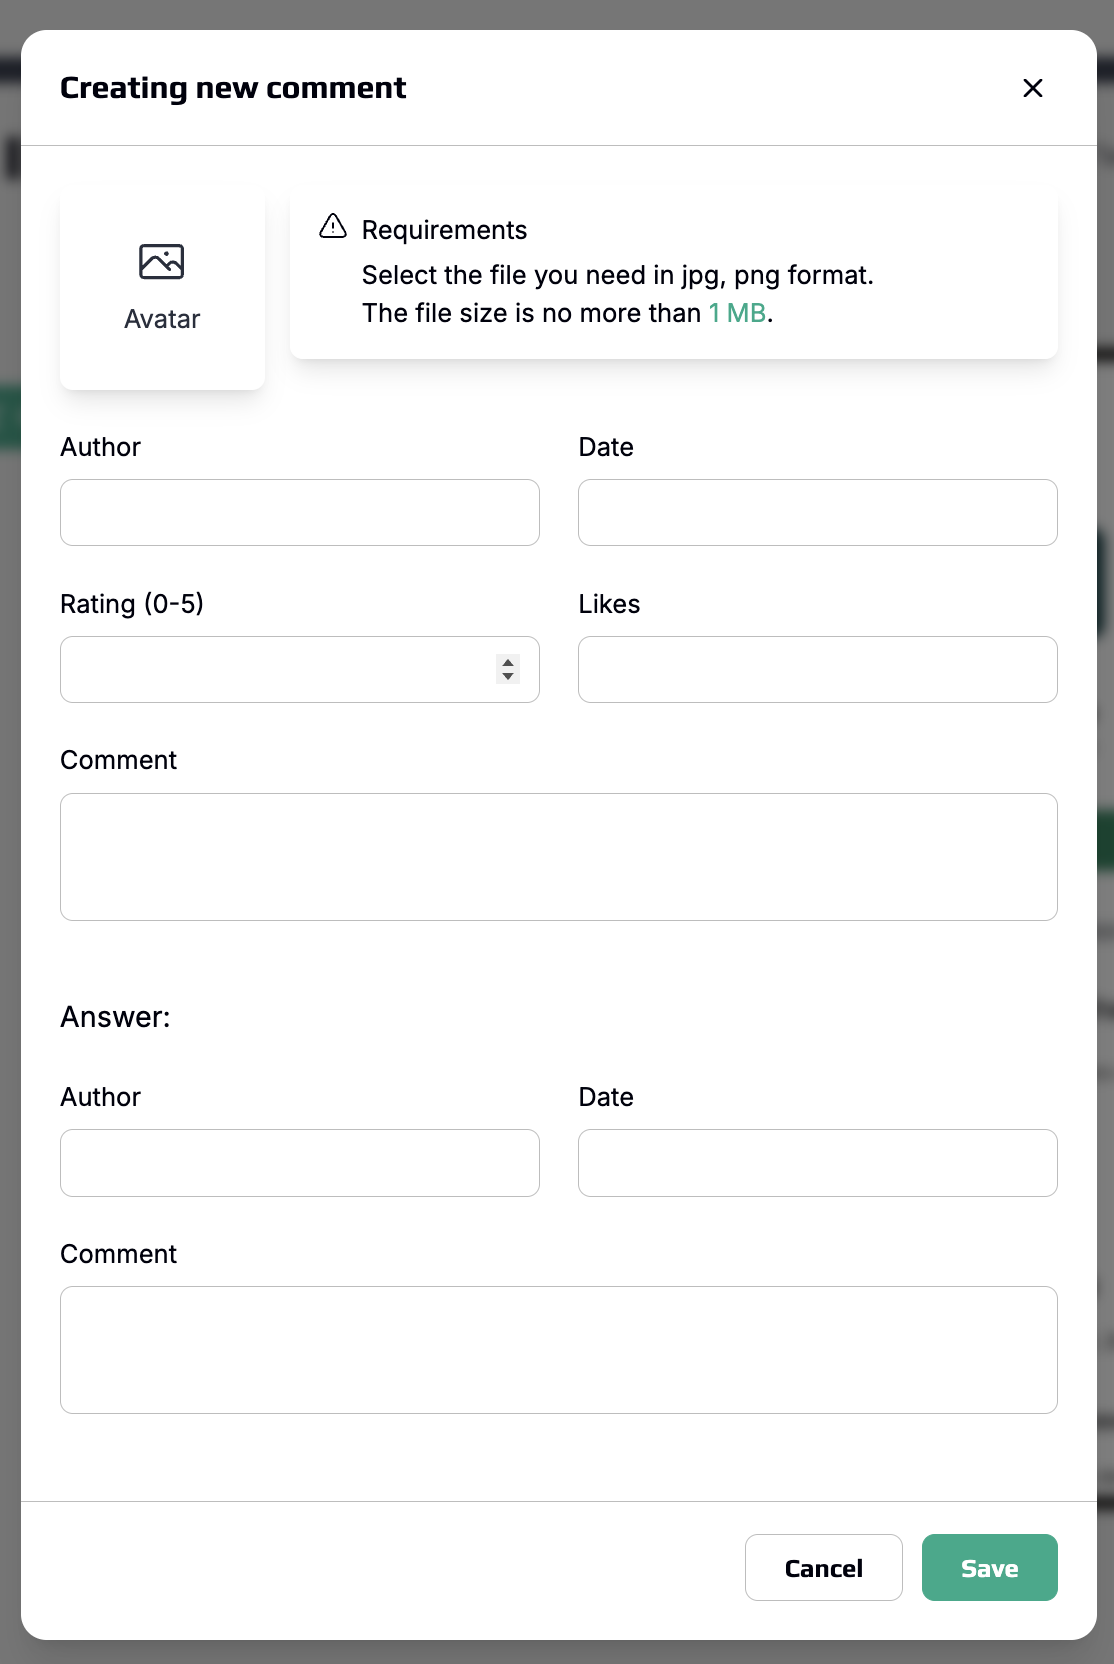
When you click the "Add comment" button, a form will open with the following fields:
Avatar: Upload an image of the user who left the review.
Author: Enter the name of the user from whom the review will be published.
Date: Specify the date of comment publication.
Rating (0-5): Select a rating from 0 to 5 stars that the user gave.
Likes: Specify the number of likes under the comment — this shows how many other users found the review helpful.
Comment: Enter the text of the review itself. Try to make comments natural and realistic, mentioning specific features of the application.
Reply to comment: You can also add a developer's response to the user's review. This creates the impression of active support and attention to the audience.
Author (reply): Specify the name of the support representative or developer.
Date (reply): Date of the reply publication.
Comment (reply): Text of the response to the user's review.
Tip: Create 5-10 diverse reviews with different ratings (predominantly 4-5 stars, but you can add a few 3-star ones for realism). Use different writing styles and mention various aspects of the application — gameplay, performance, design, support.
Analytics
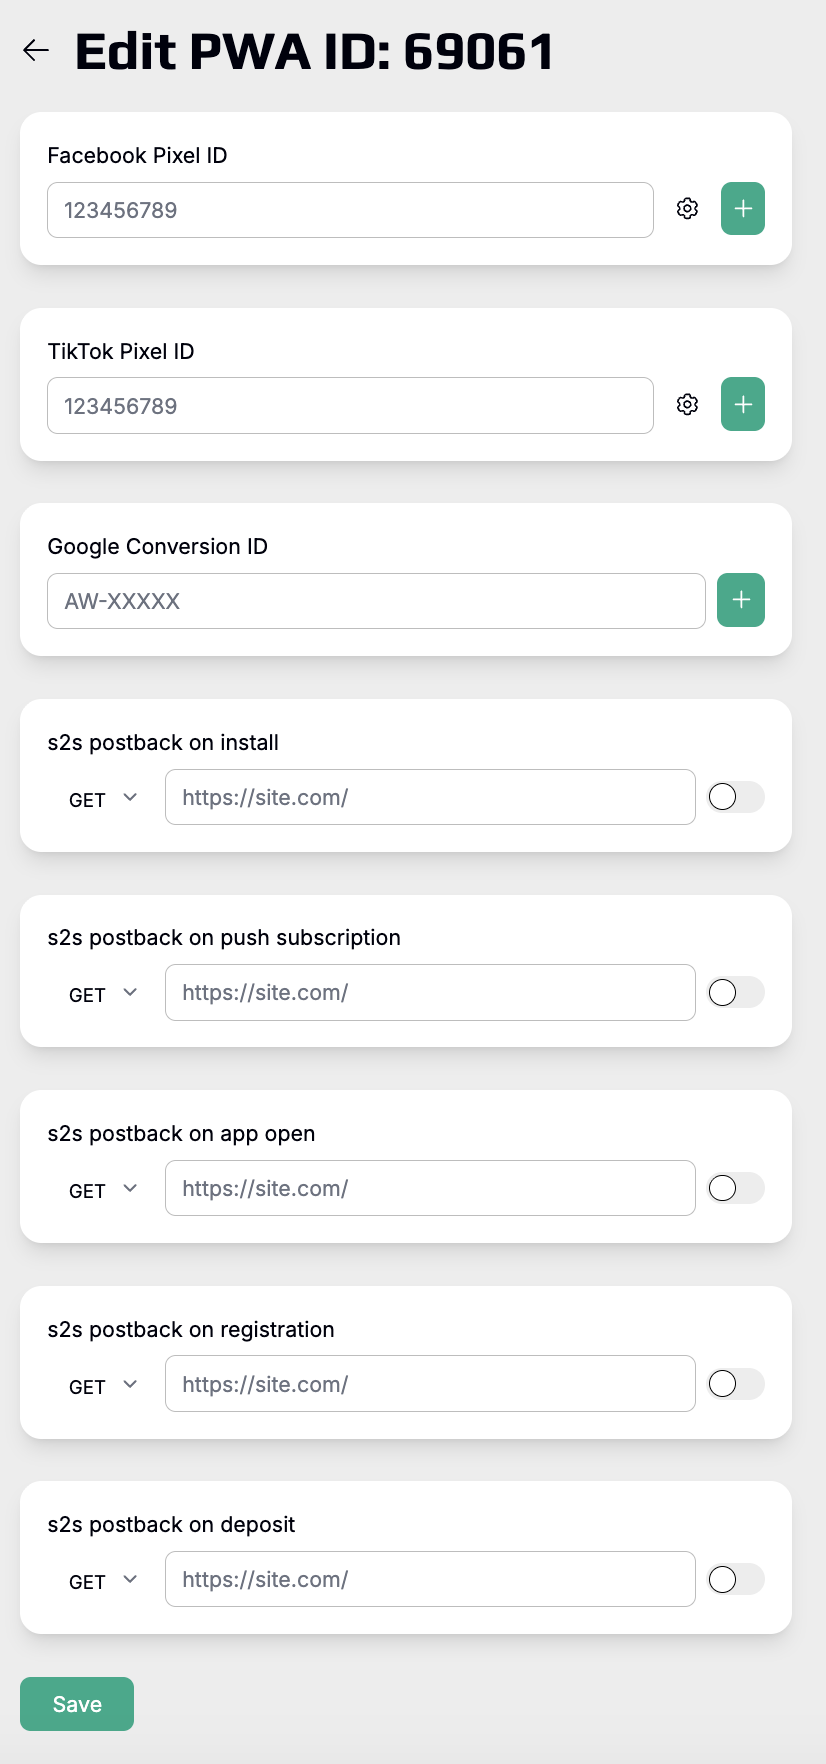
The "Analytics" tab allows you to integrate various tracking systems and configure automatic event sending (postbacks) to your trackers or CRM systems.
Tracking Pixel Integration
Facebook Pixel ID: Enter your Facebook pixel ID to track conversions and user events. This will allow you to optimize advertising campaigns in Facebook Ads based on data about user actions in your PWA.
To the right of the field are two buttons:
"⚙️" — settings for additional pixel parameters "+" — adding multiple Facebook pixels
TikTok Pixel ID: Specify the TikTok pixel ID for tracking events and conversions when running ads in TikTok Ads. The platform will automatically send events for installation, app opening, and other user actions.
Similar to Facebook, settings and multiple pixel addition buttons are available.
Google Conversion ID: Enter the Google Conversion ID (format: AW-XXXXX) to track conversions in Google Ads. This will allow you to measure the effectiveness of advertising campaigns and optimize bids based on real installation data.
Server-to-Server (S2S) Postbacks
The platform supports configuring server postbacks for sending events directly to your tracking systems. This is a more reliable way of transmitting data compared to client-side pixels.
s2s postback on install: Postback that is sent when a user installs the PWA application.
s2s postback on push subscription: Postback fires when a user subscribes to push notifications.
s2s postback on app open: Postback is sent each time a user opens the installed application.
s2s postback on registration: Postback fires when a user registers in the application (if your PWA has a registration system).
s2s postback on deposit: Postback for tracking deposit events — especially relevant for gambling and betting niches.
Configuring Postbacks
For each postback, you need to specify: Request method Select the HTTP method from the dropdown list: GET (default) POST URL Enter the full URL of your tracker or analytics system where data will be sent (for example, https://tracker.com/postback?click_id={click_id}&event=install). You can use macros in the URL to pass dynamic data:
{click_id} — Click ID from the ad network {user_id} — User ID {event} — Event type And other parameters depending on your tracker
Activation toggle: To the right of each postback is a toggle to enable/disable data sending.
Tip: Proper analytics setup is critical for evaluating traffic effectiveness and optimizing advertising campaigns. Make sure all postbacks work correctly by testing them before launching main traffic.
Completing Setup and Publishing
After filling in all necessary sections, your PWA application is ready to launch. Don't forget to check all settings in the "Settings", "Tracker", "Template", "Application", and "Analytics" tabs and save all changes.
Now your PWA application is fully ready to work and you can see it in the PWA section.
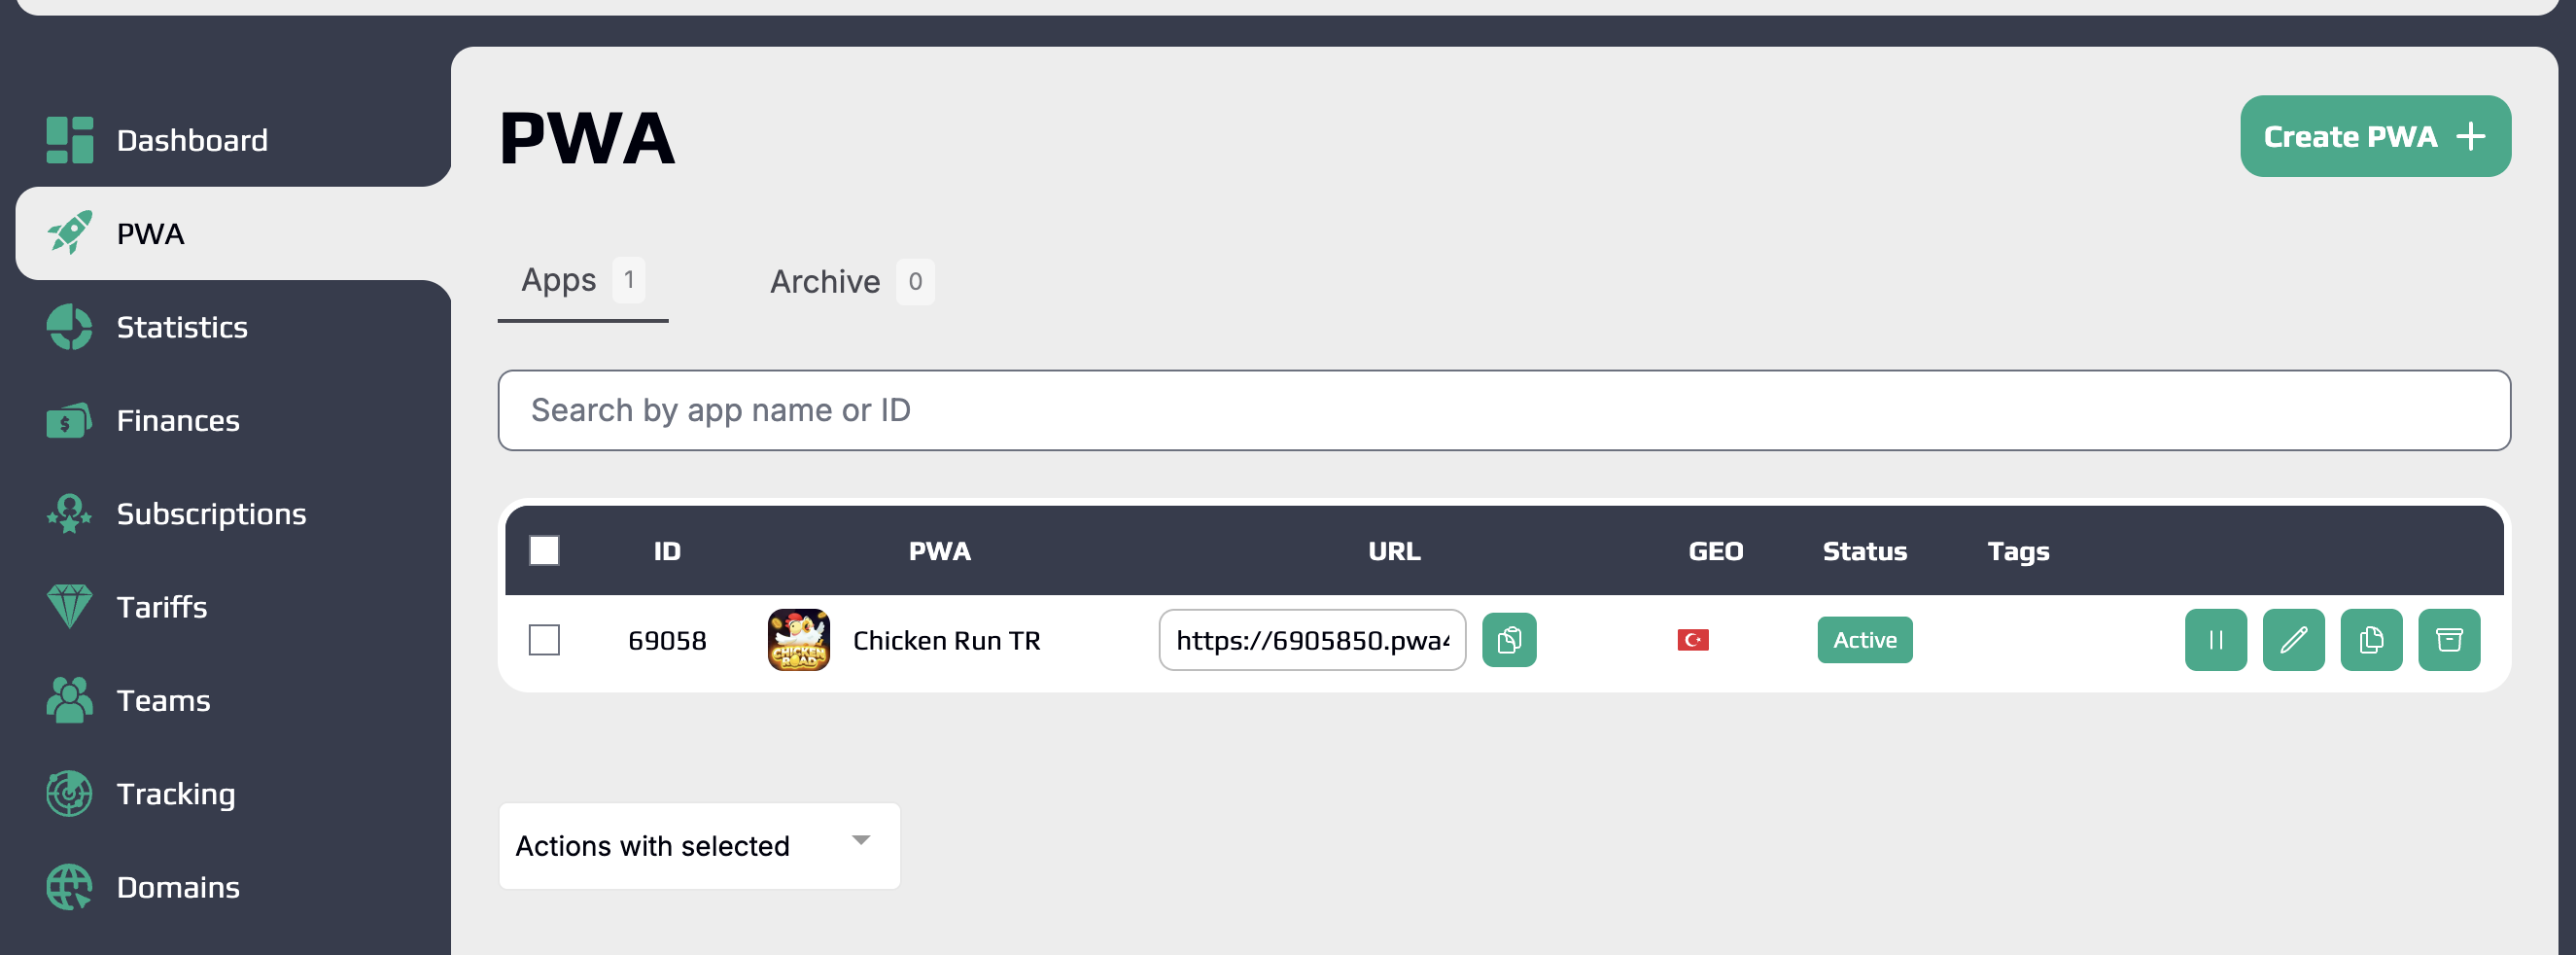
Copy the URL of your application from the list Open the link in a browser to check how the application looks and works Test the installation process Launch traffic
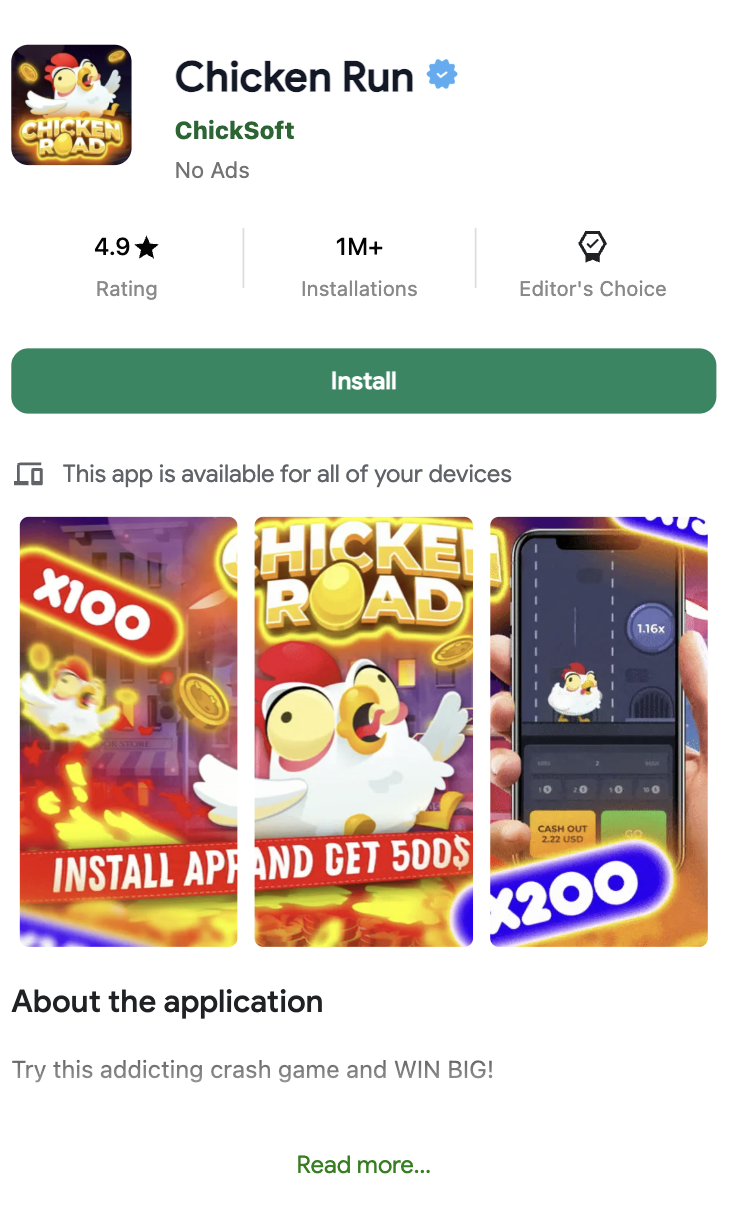
The application will work on any device, automatically adapting to the user's screen size. All configured pixels, postbacks, and analytics will start collecting data from the very first visitors.
Need Help?
If you have questions about PWA application setup, platform operation, or need consultation on conversion optimization — contact your personal manager.
Manager contacts are listed in the lower left corner of the control panel.
The EpicPWA team is always ready to help you achieve maximum results in your advertising campaigns!
 9 Apr 2026